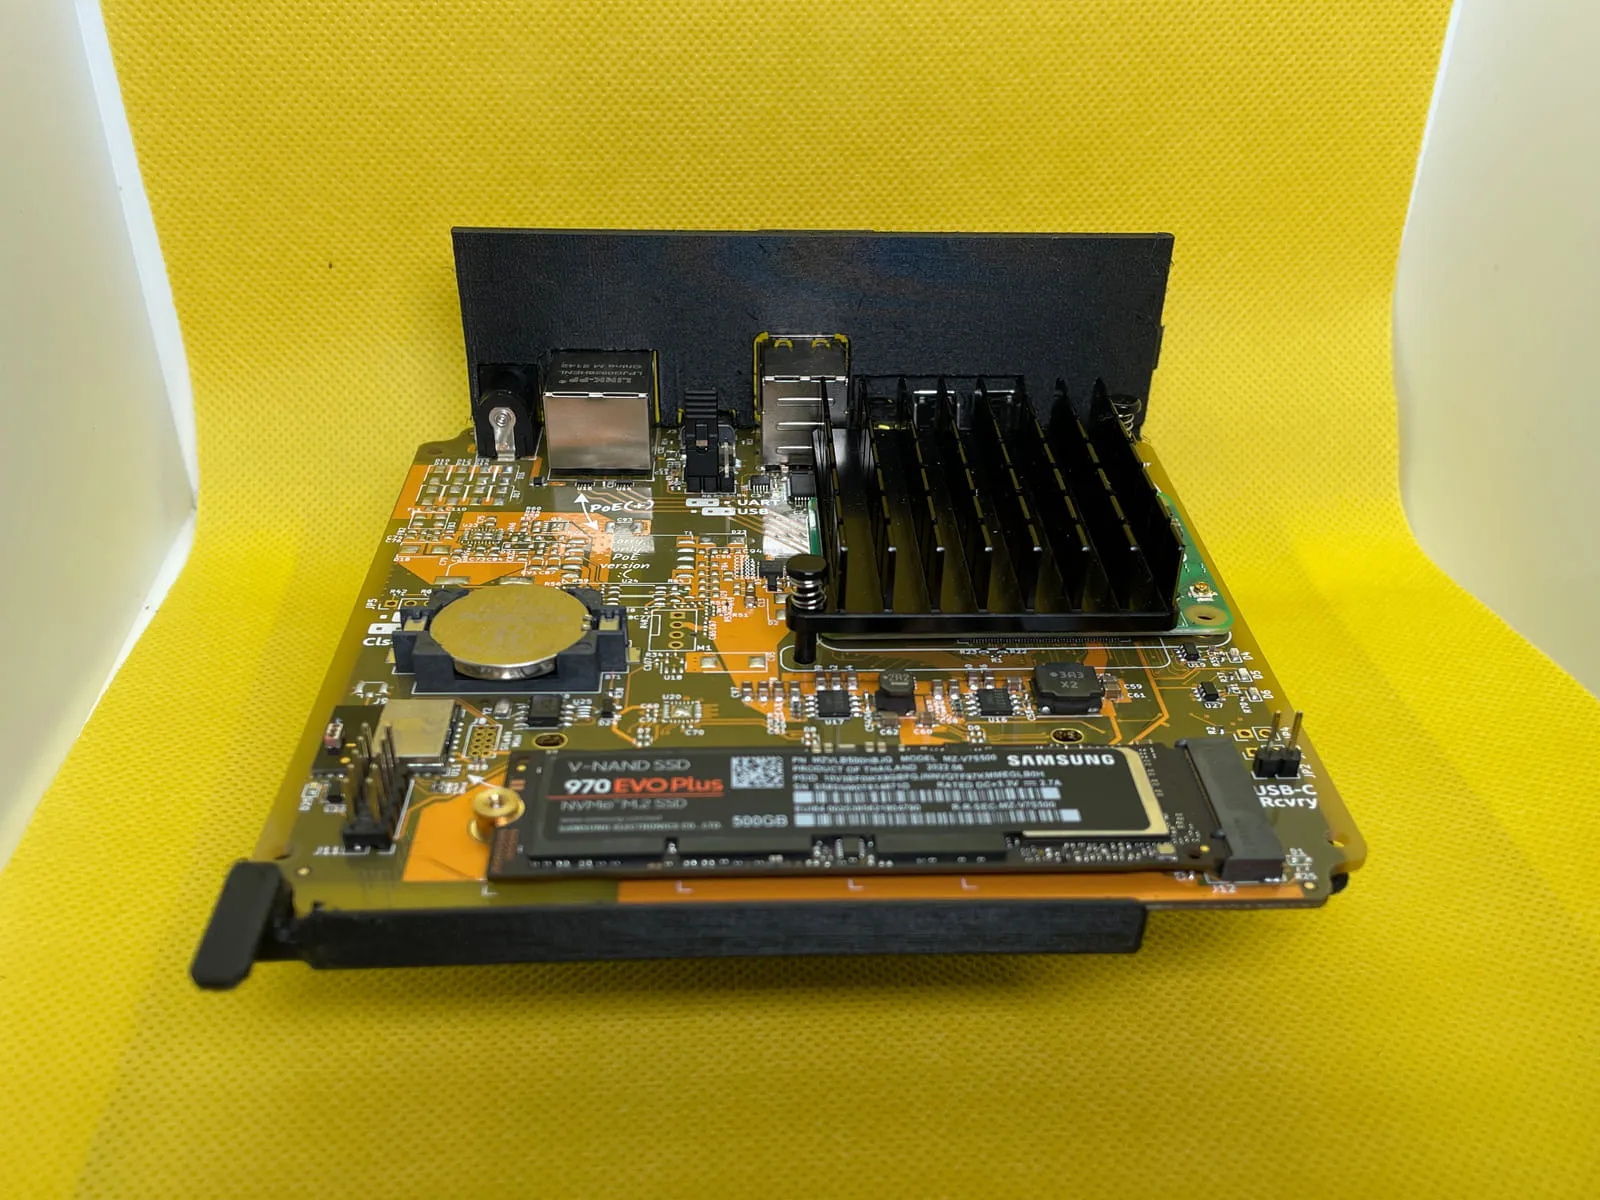
I’ve been running Home Assistant for quite some time. I use it to control the roughly 75 devices and integrations in my home. I currently run HA on a dedicated Raspberry Pi 4 Model B with the Recorder database stored on a Synology NAS on the same network. While I’ve had no complaints about the performance and reliability of this setup, I was very excited when the HA team announced that they were working on a purpose-built device called Home Assistant Yellow. Among many other features, the Yellow runs on a Raspberry Pi Compute Module 4 and supports dedicated SSD storage.
The Pi that currently runs HA, lives in my small home 8U network rack next to another Pi running Pi-hole. I rack mounted the Pis thanks to the Raspberry Pi Rack Mount model on Thingiverse and this 1U Decora Rack Panel. While this has worked fine, it always bothered me that half of 1U went unused. Of course, this left space for more Pis, but it’s been a couple of years, and that space has remained empty.
Knowing I also wanted to rack mount the HA Yellow, I would need to find a new space for it. An obvious option would be to swap the Pi with the Yellow, but this would still leave me with half the space unused. And if I moved the Yellow out of that panel, I’d be left only using a quarter of the available space. With limited vertical space in the 8U rack, I set out to find a better solution using more horizontal space.
Fortunately (unfortunately?), I had eight months to wait for the Yellow to arrive. During that time, I kept an eye out for possible solutions and watched as some of the YouTubers in the home automation space began to receive their devices. Eventually, I came across this modular patch panel on Amazon.
In my current rack, I only use about half the keystones in the patch panel, and the other half remains empty. And since the ports on both switches are on the right side, I have to use longer patch panels to connect them to the leftmost keystone patches. A better and more common solution would be to use two patch panels utilizing the right half of both. However, this means even more empty horizontal space in the rack.
The way I saw it, these were the problems I was trying to solve.
- Fit everything neatly in the existing 8U rack
- Maximize horizontal space
- Rack-mounted HA Yellow and Raspberry Pi
- Neater patch cables
With the new modular panel, I can split it up using as many or as few of the four sections as I want for keystone jacks and the remaining for whatever else.
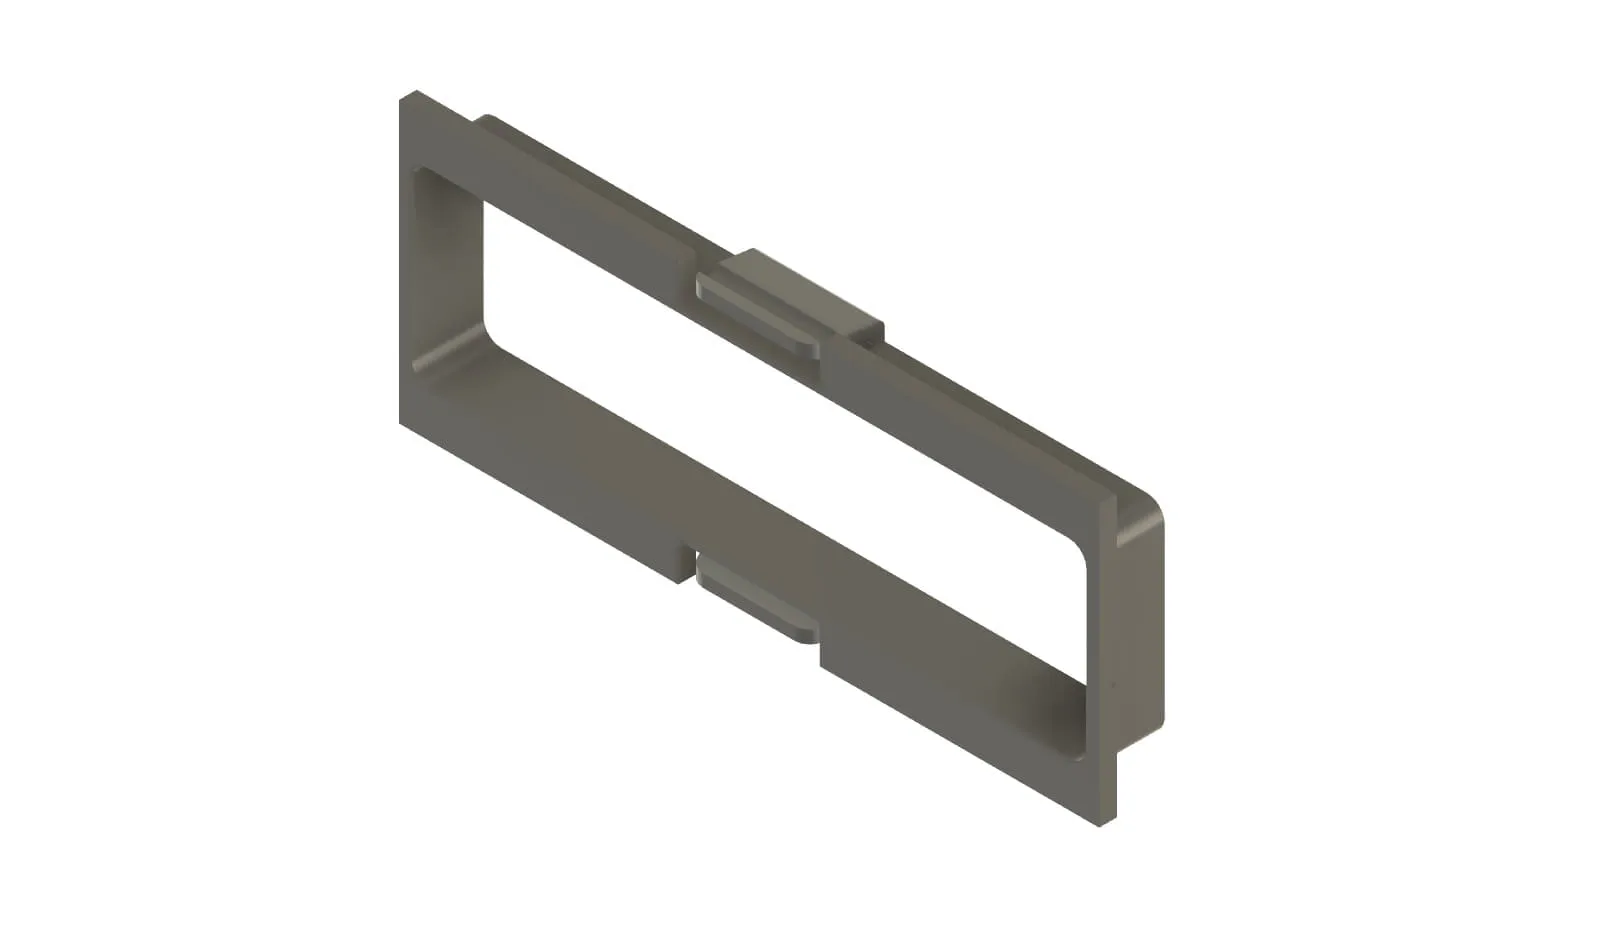
I knew there wouldn’t be any off-the-shelf product for mounting the HA Yellow (or any other device) in that patch panel which created an opportunity for me to design and print it myself. Over the past year or so, I’ve been working to improve my Fusion 360 skills, so this would be the perfect chance to apply what I’ve learned and model something myself.
First, I iterated through the process of measuring the included module, modeling in F360, and printing prototypes to get a panel that matched the original modules.
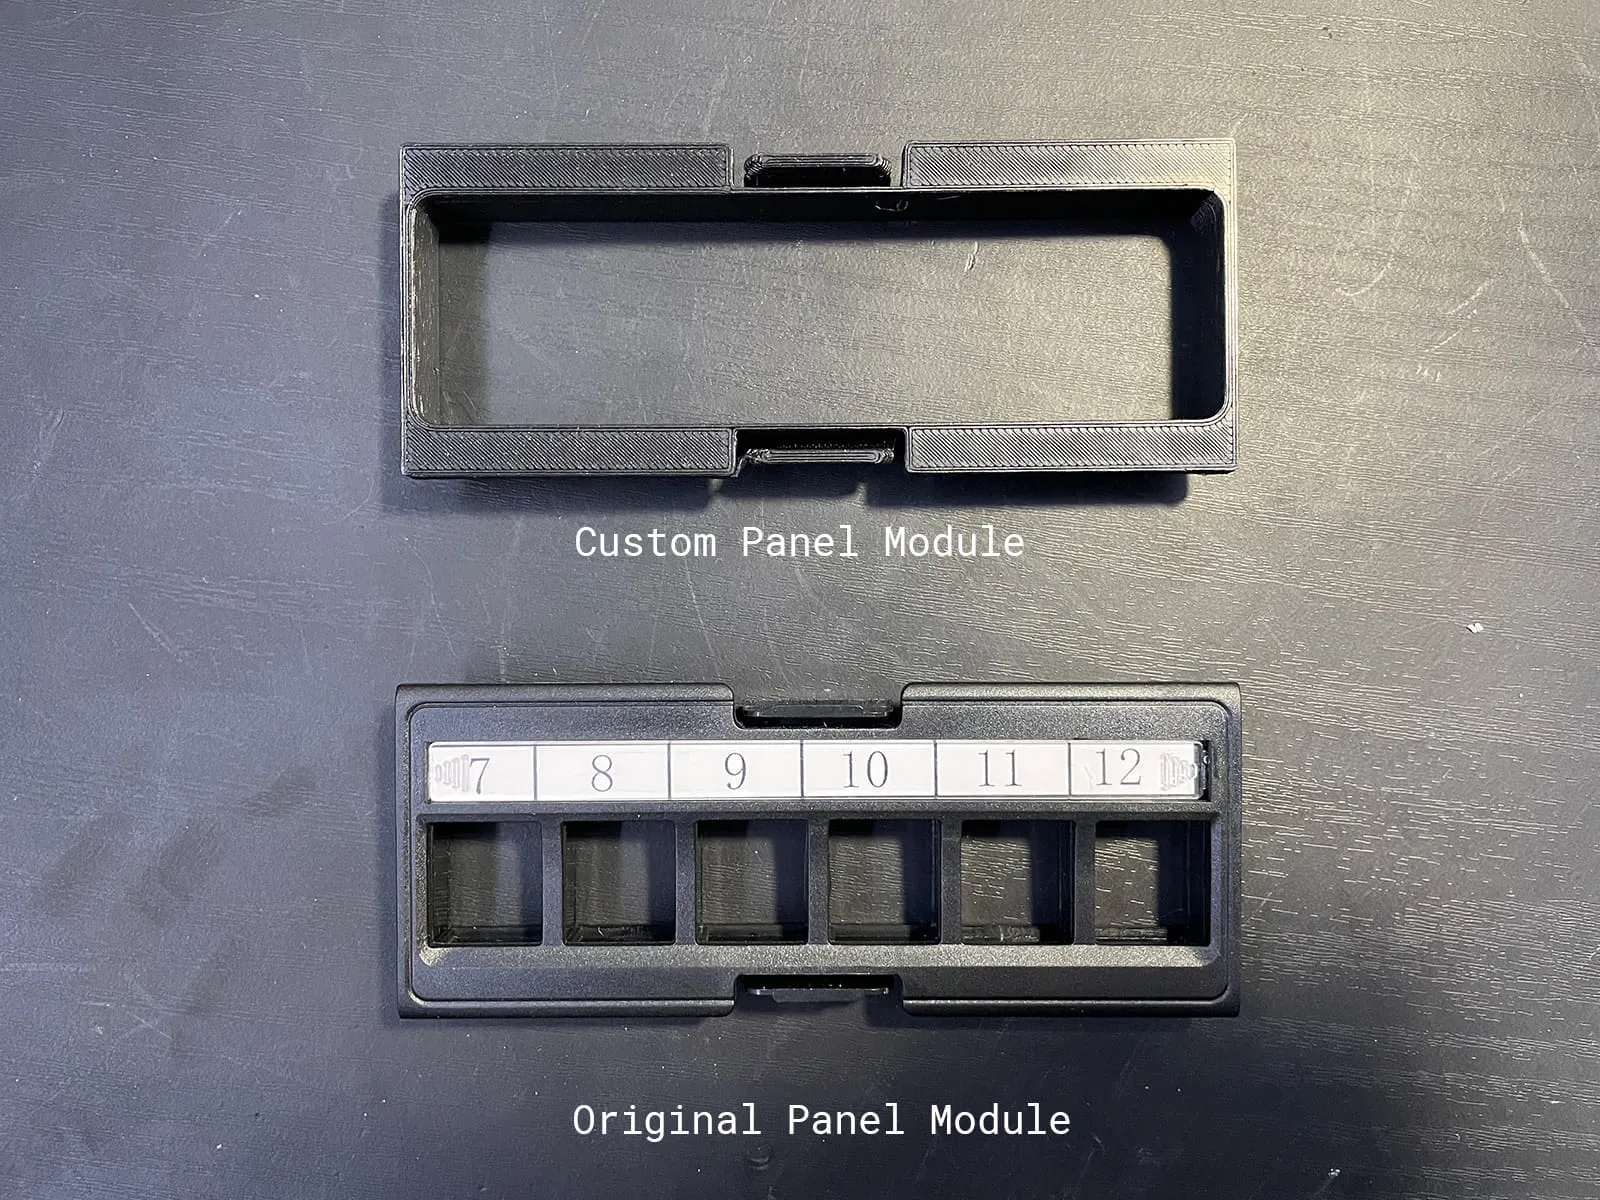
Creating the after-market part gave me a module I could use as a base for future variations. Unfortunately, the HA Yellow device is wider than the opening for each module in the patch panel. That meant I had to scrap most of the model I had just created. However, it would be helpful later for mounting a Raspberry Pi.
From there, I spent a few weeks slowly creating and iterating through designs and prints, resulting in the following.

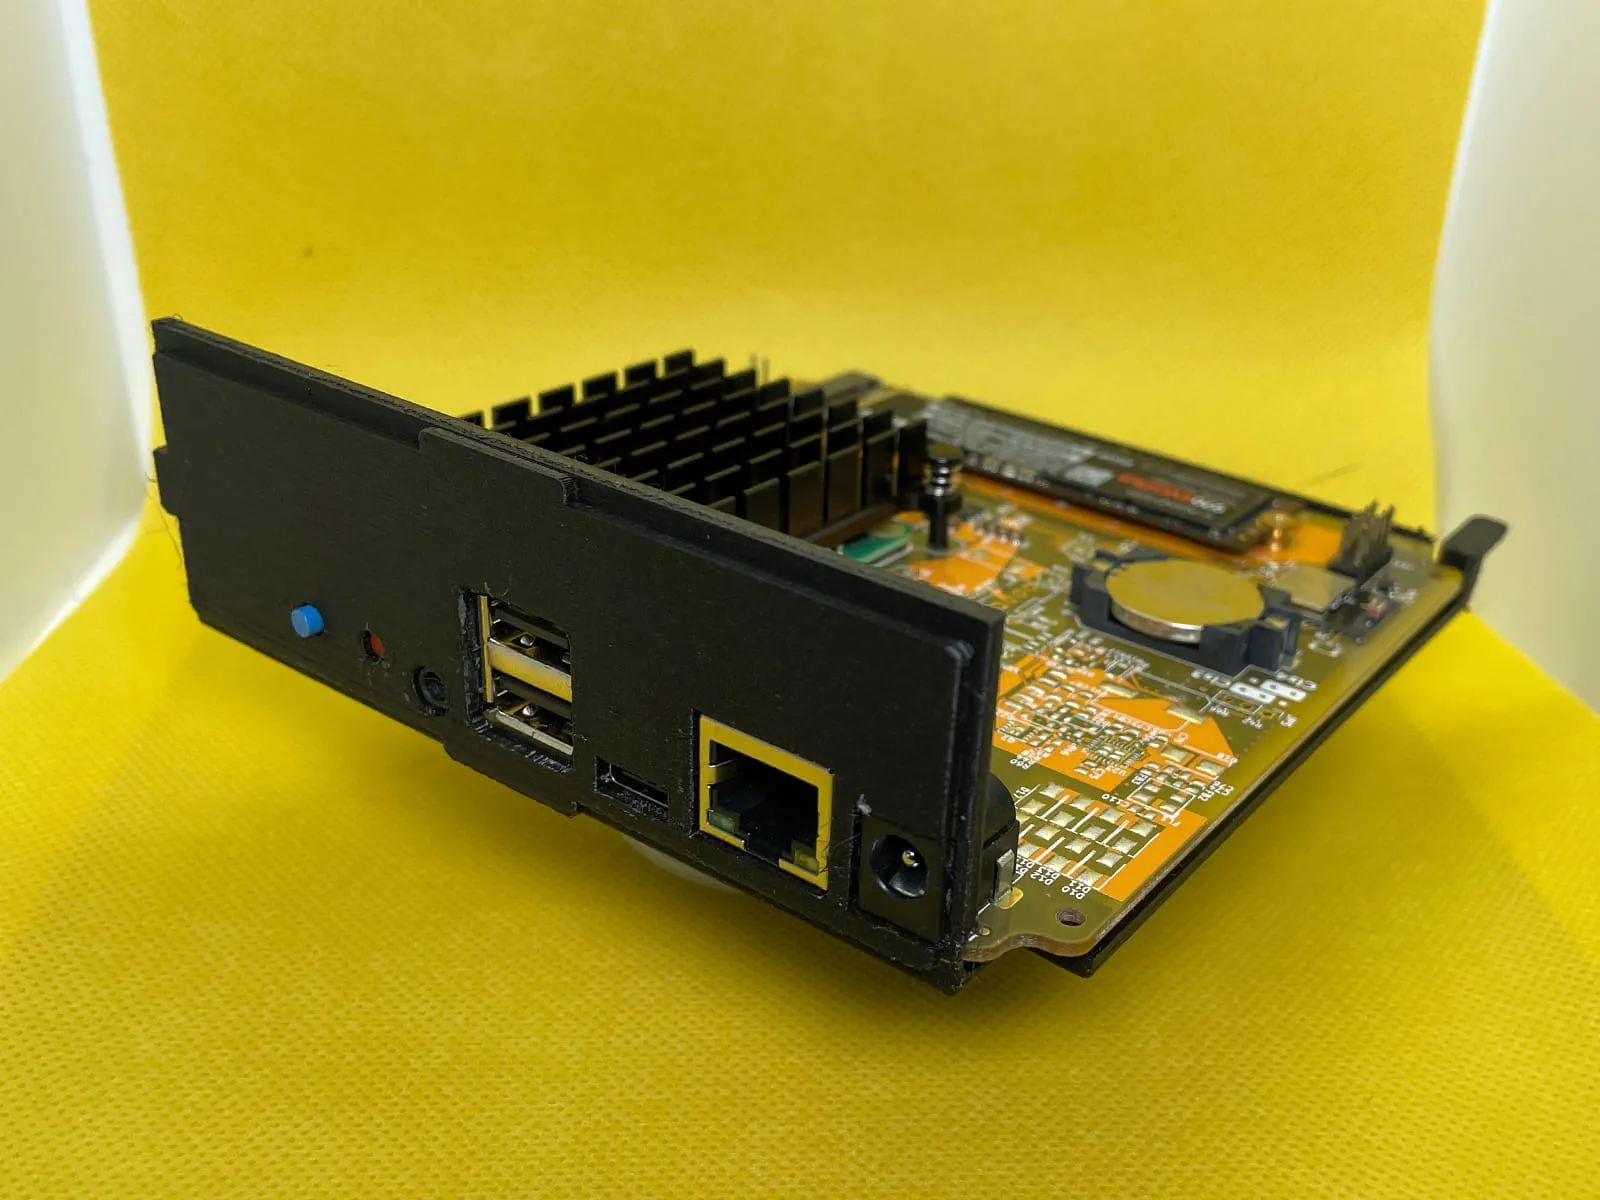

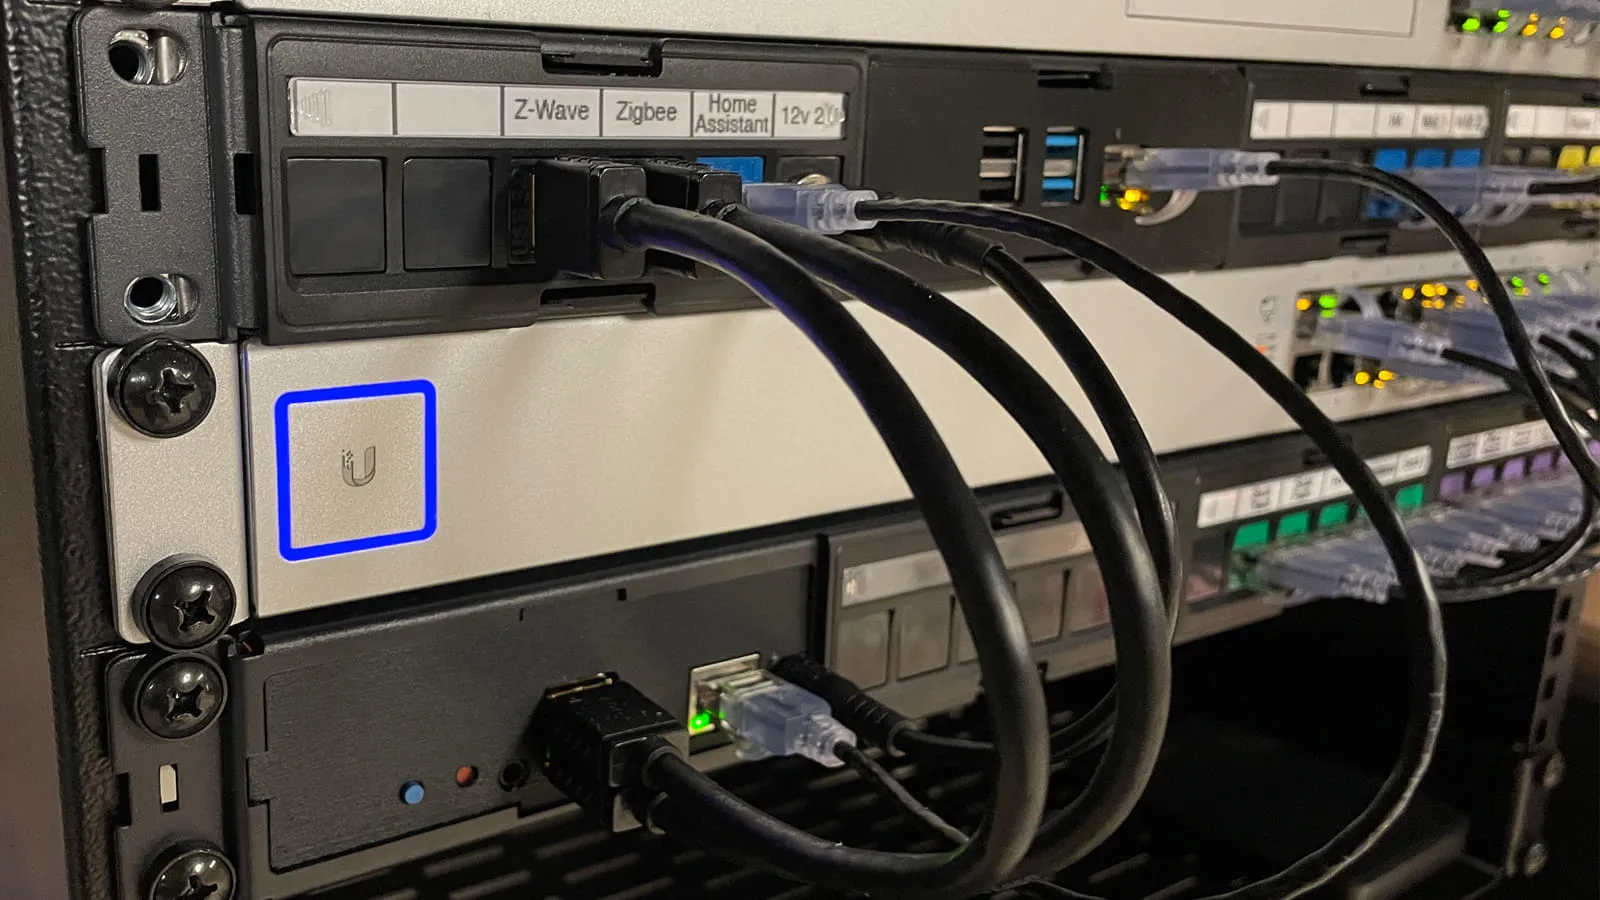
Unlike the original modules that slide in from the front of the panel, this one slides in from behind the panel. Swapping the Yellow in and out requires unscrewing and removing the entire panel from the rack. Removing the panel isn’t the end of the world, as I don’t imagine I’ll need to mess with it after installation.
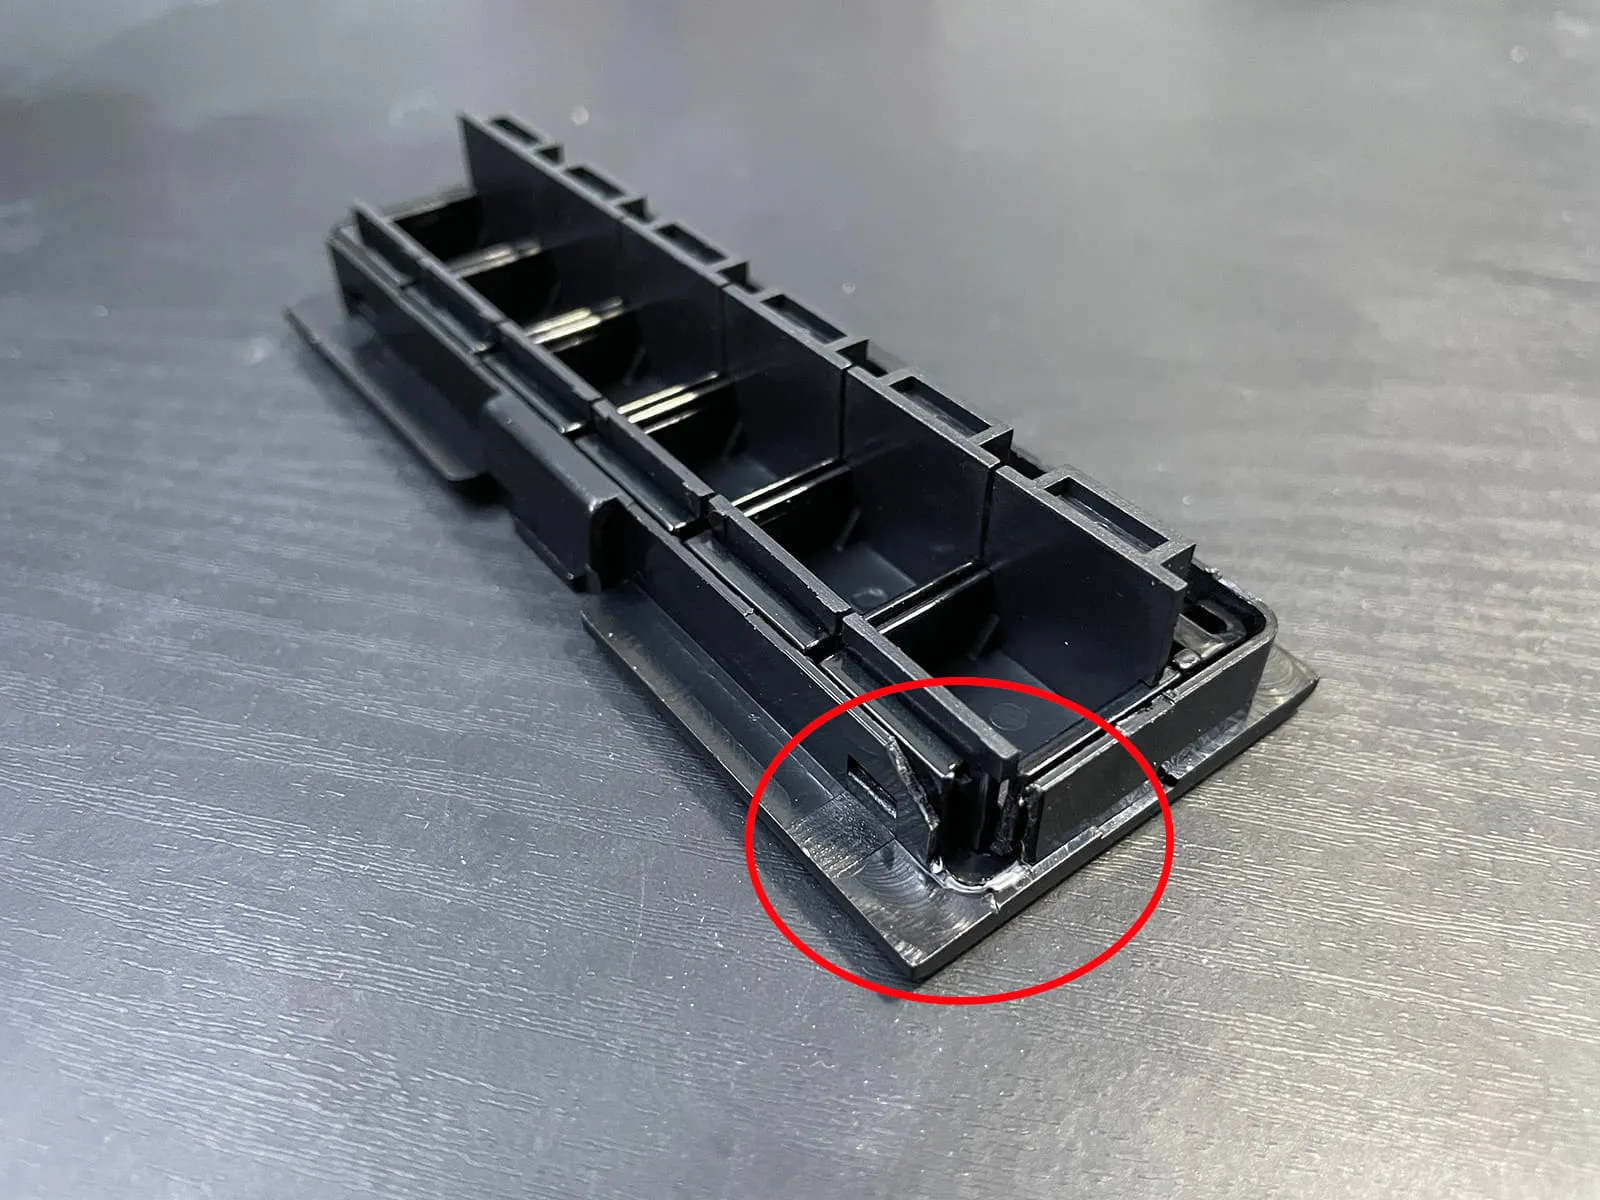
The design I settled on fits in the leftmost opening in the panel. However, it could be modified to fit in the other slots. Wherever it goes, a minor modification of the adjacent modules is needed. In this case, I used a pair of flush cutters to create a small notch in the bottom corner of the adjoining keystone module.
I’m super happy with this solution. The only thing missing is easy access to the status LEDs on the side of the Yellow. I’ve been going back and forth on whether I should sell the STL file and a printed version for those without a printer. I am still deciding what to do, so let me know what you think in the comments.
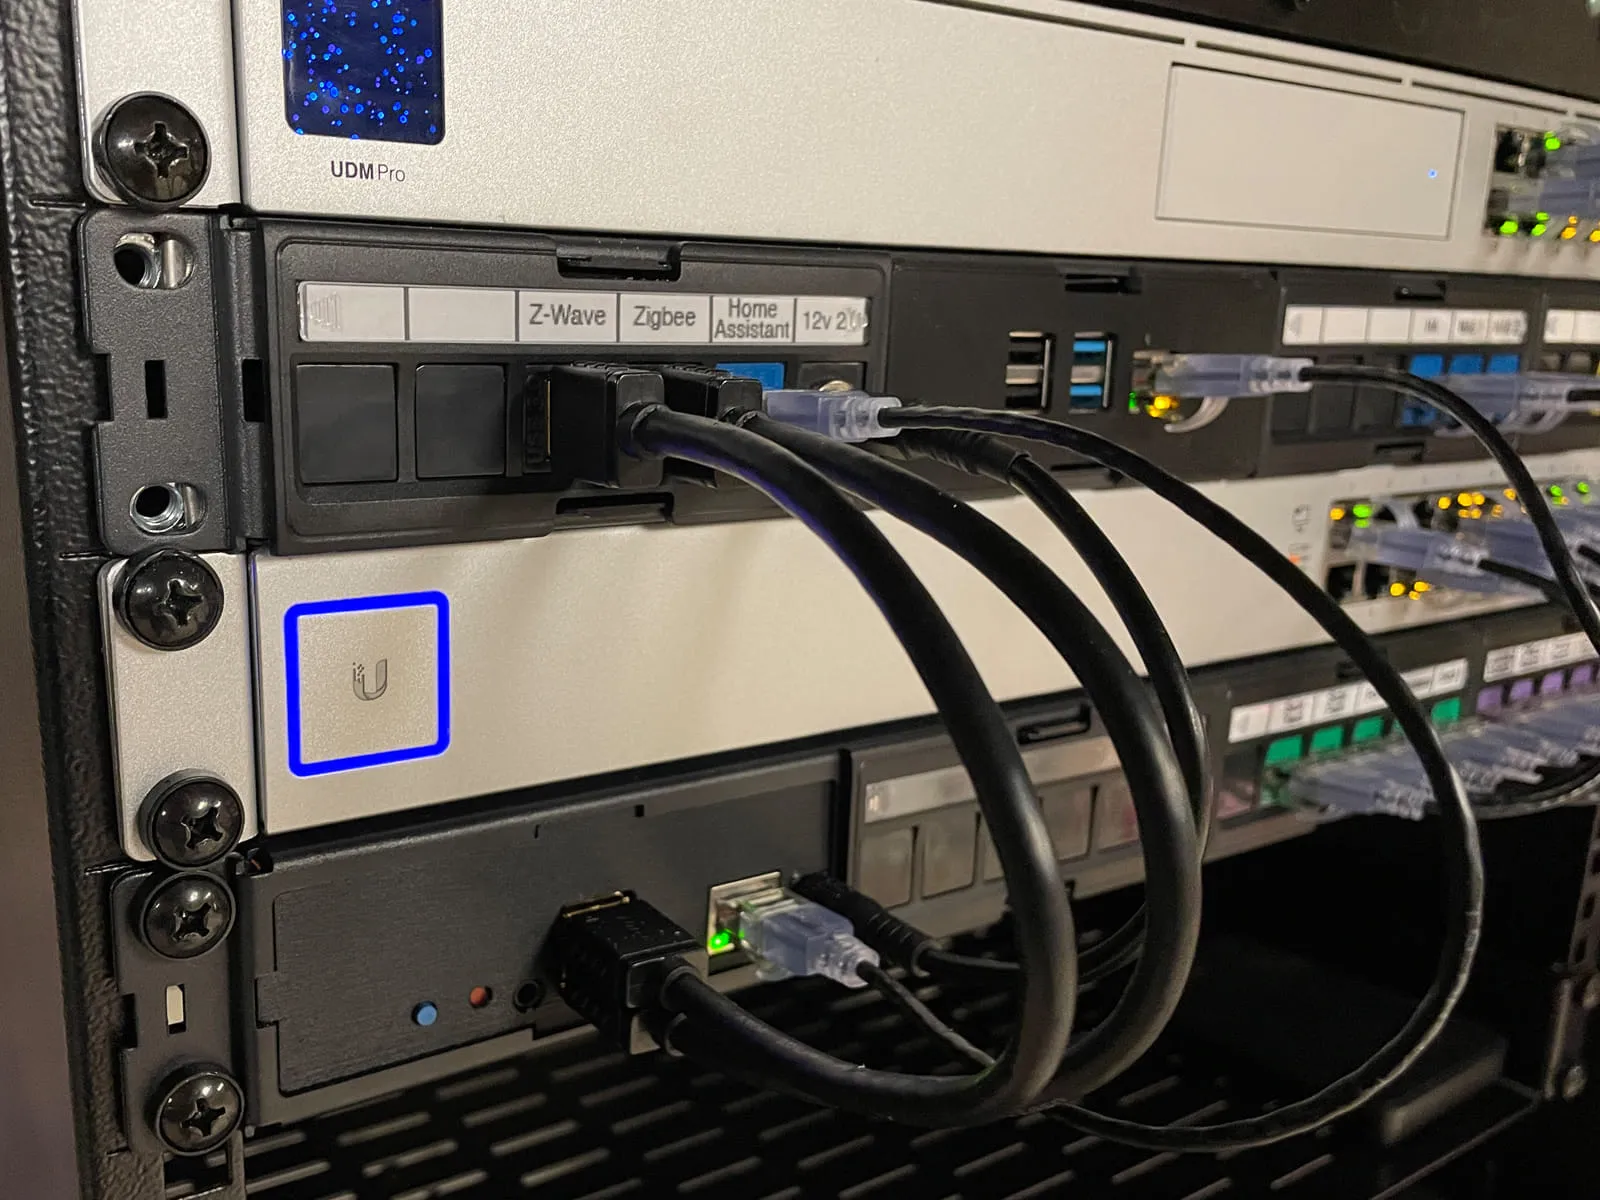
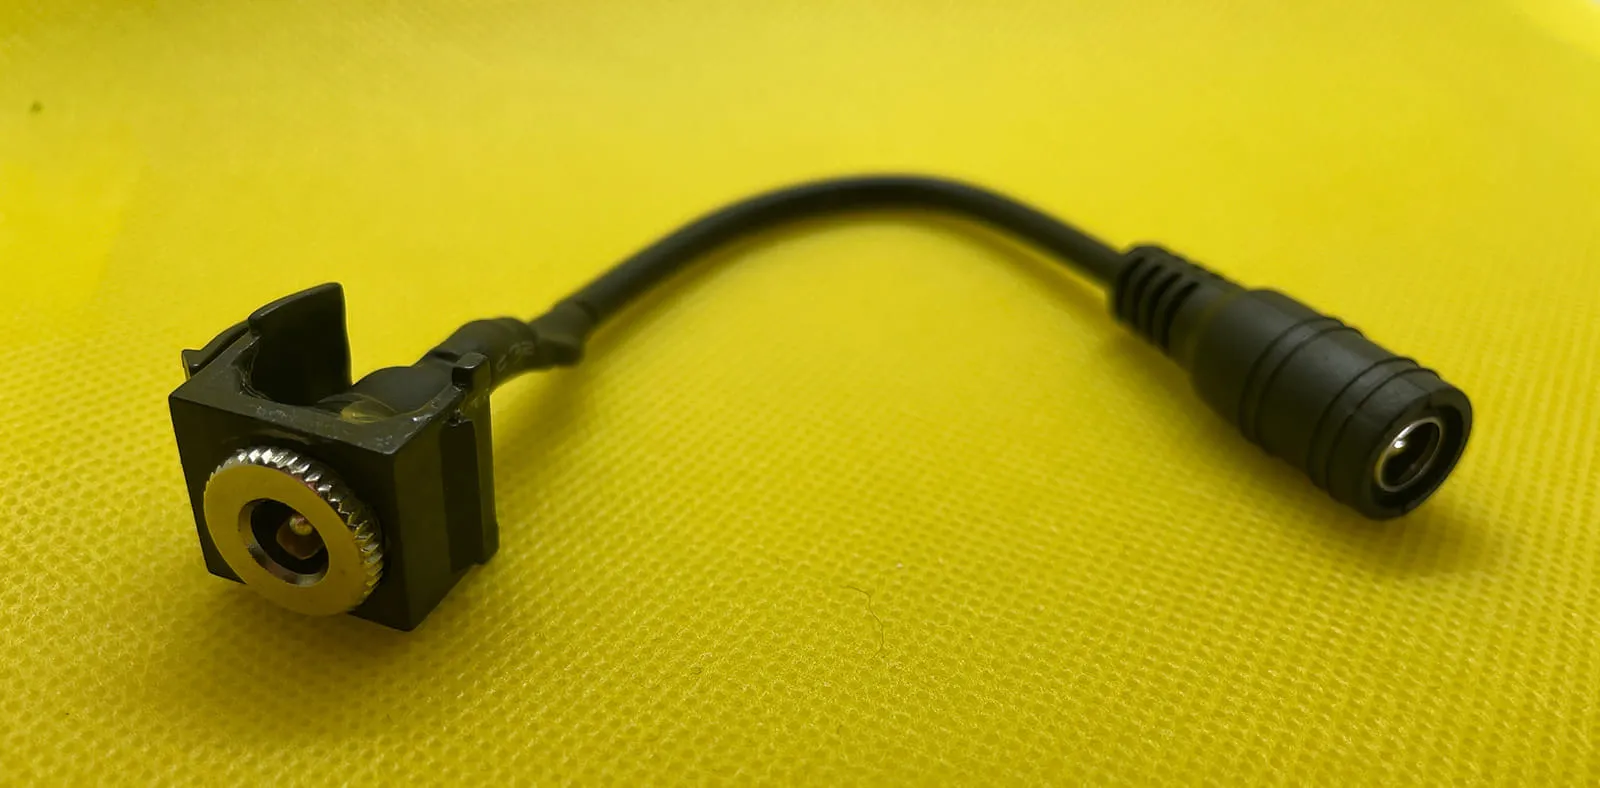
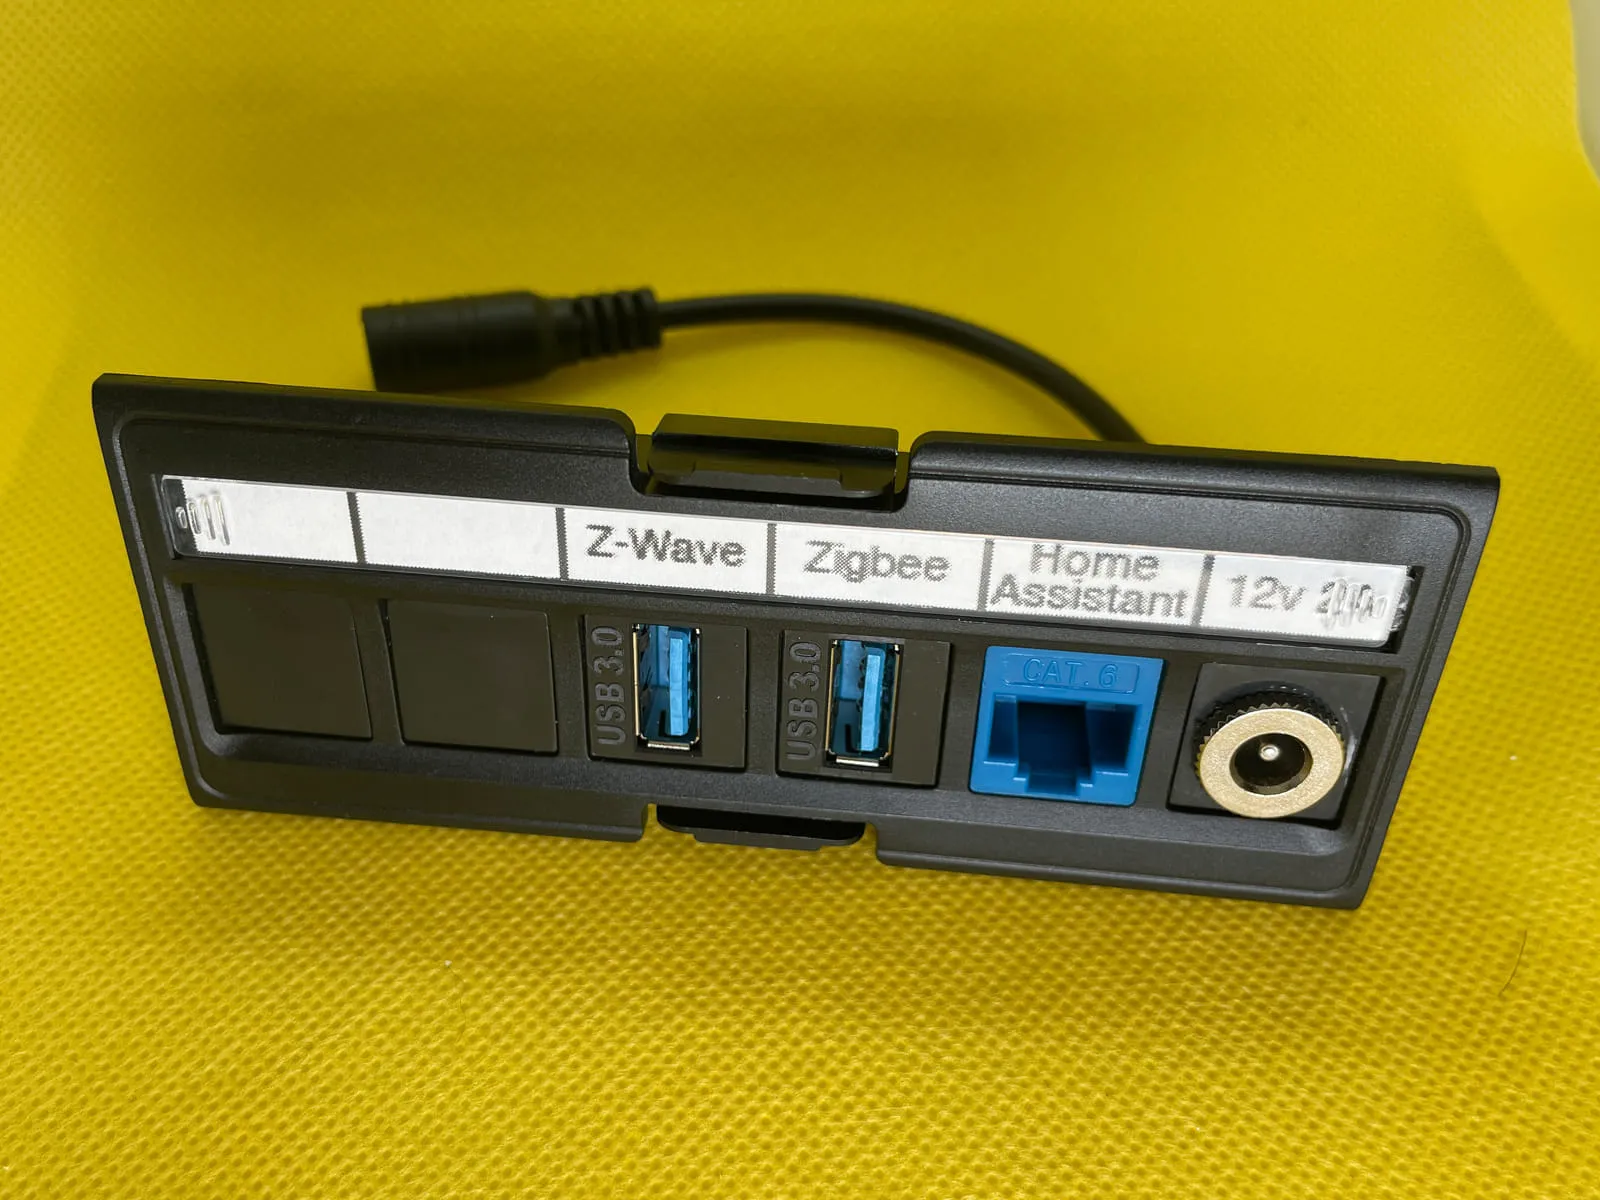
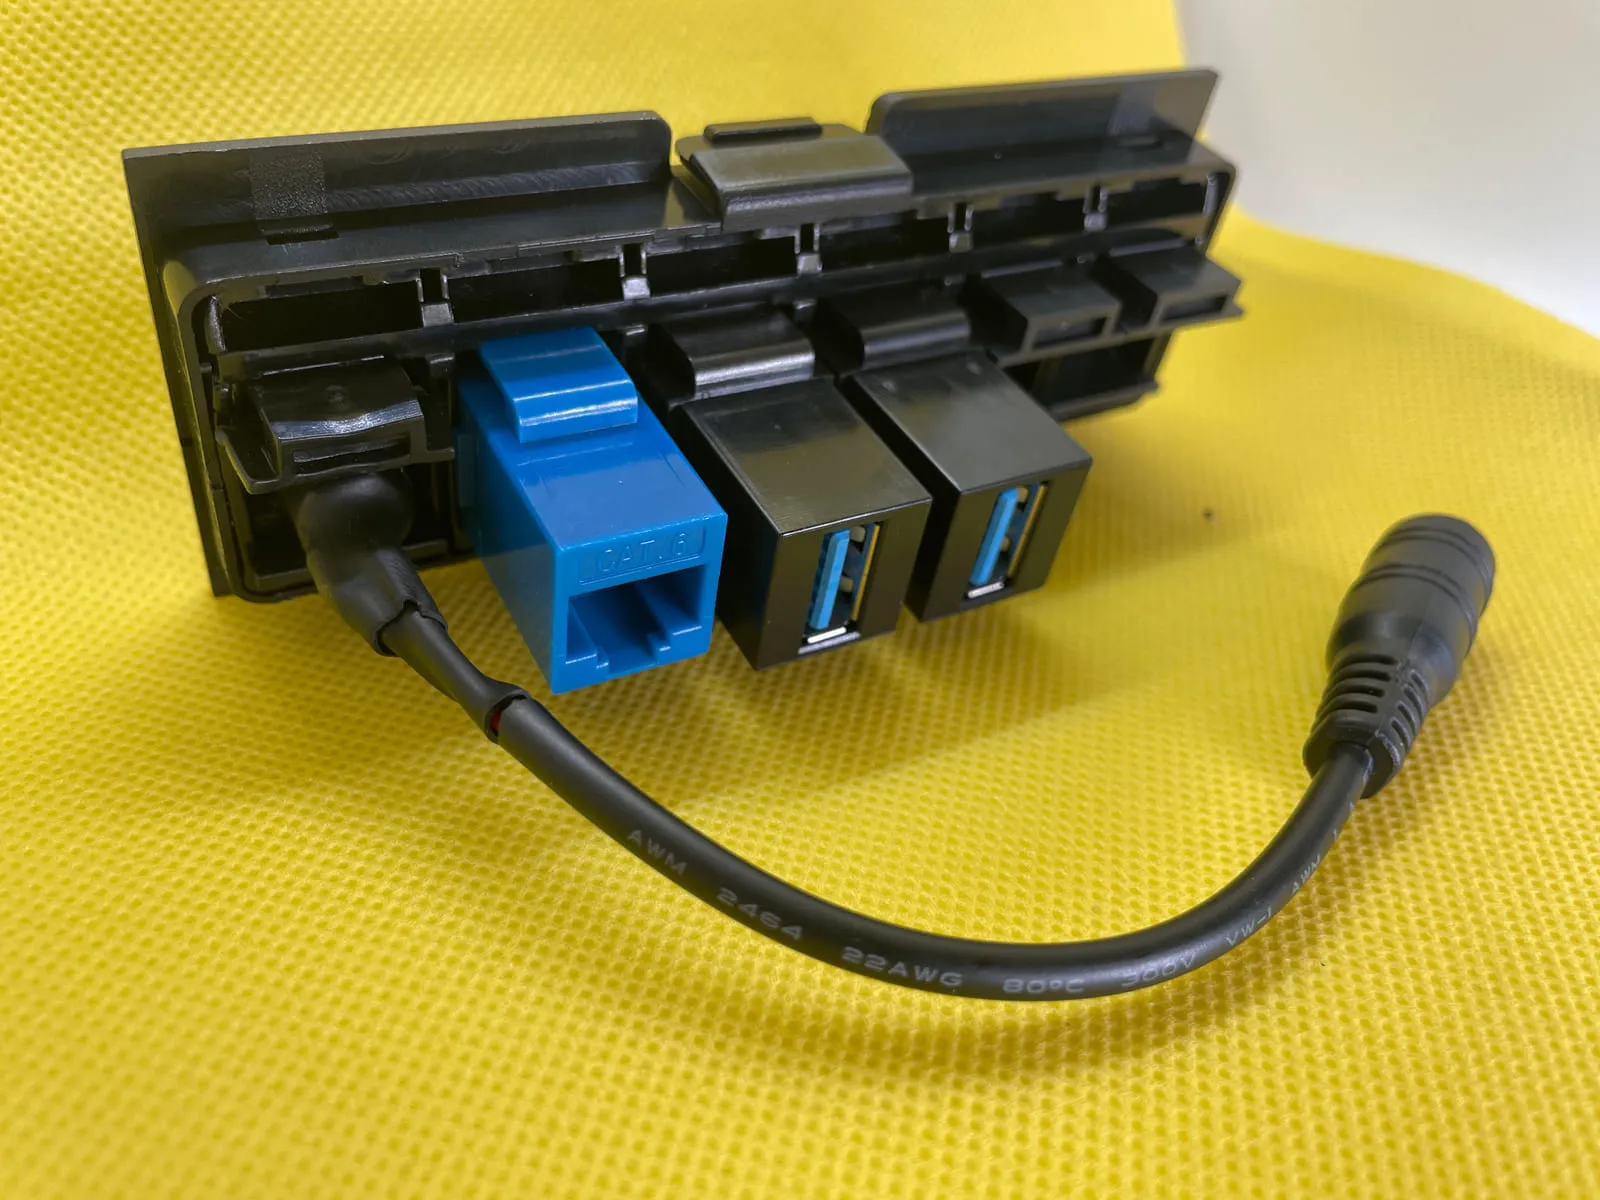
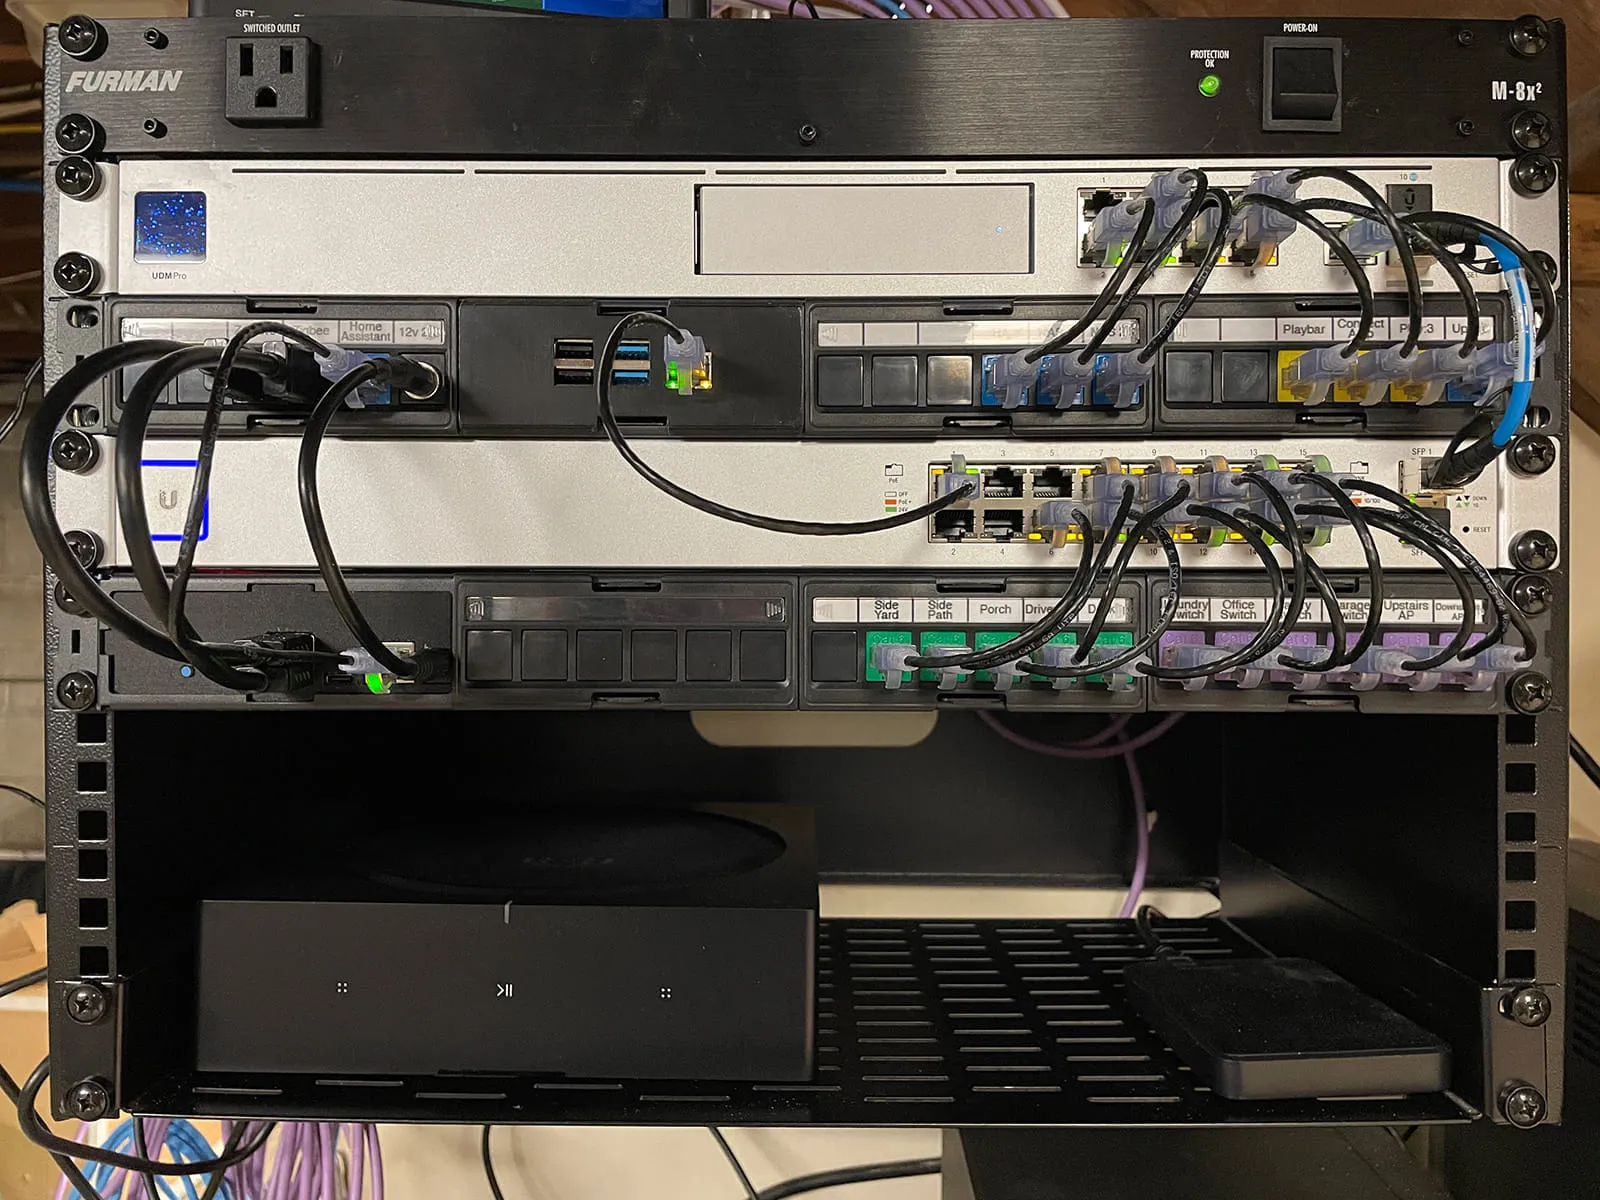
To keep things super clean, I bought USB keystone inserts and short USB cables to extend the two Yellow USB ports out the back of the rack for my Z-Wave and Zigbee antennas. I also created a custom barrel jack keystone and a barrel jack patch cable for passing power to the HA Yellow.
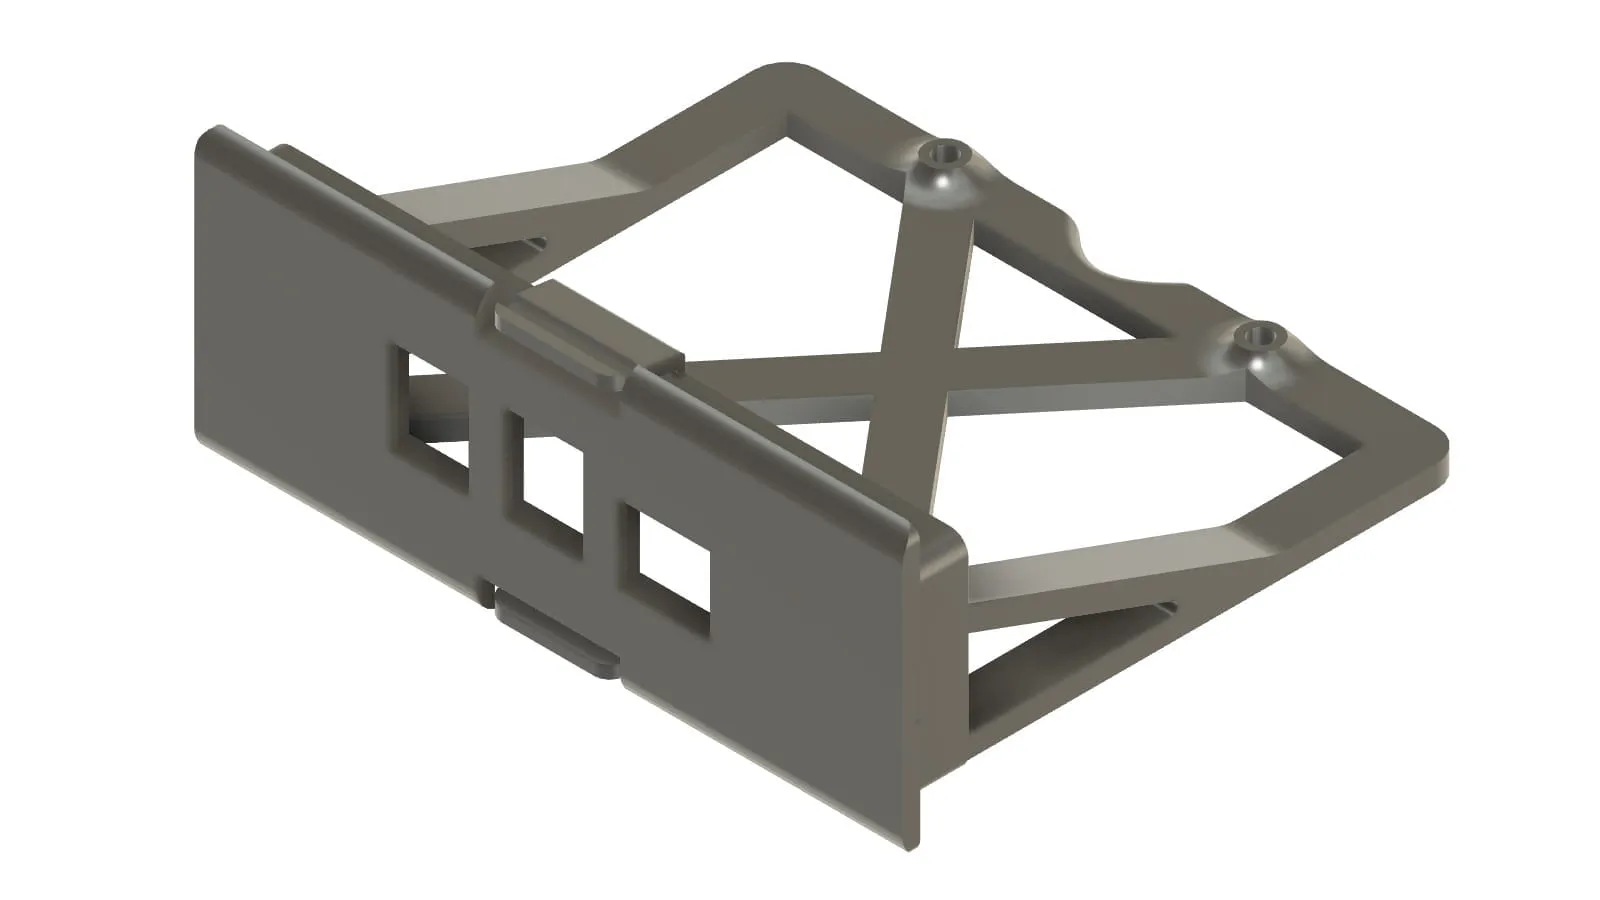
With the Yellow device now mounted, I could move on to mounting the Raspberry Pi. Designing this model was much easier as the Pi’s width was smaller than the module’s opening. I could use the original model from above, add a solid face, cut out the spaces for the Pi’s ports, and add horizontal support. Creating the Pi mount only took a few iterations before landing on the following, which I have made available for free on Printables.com.
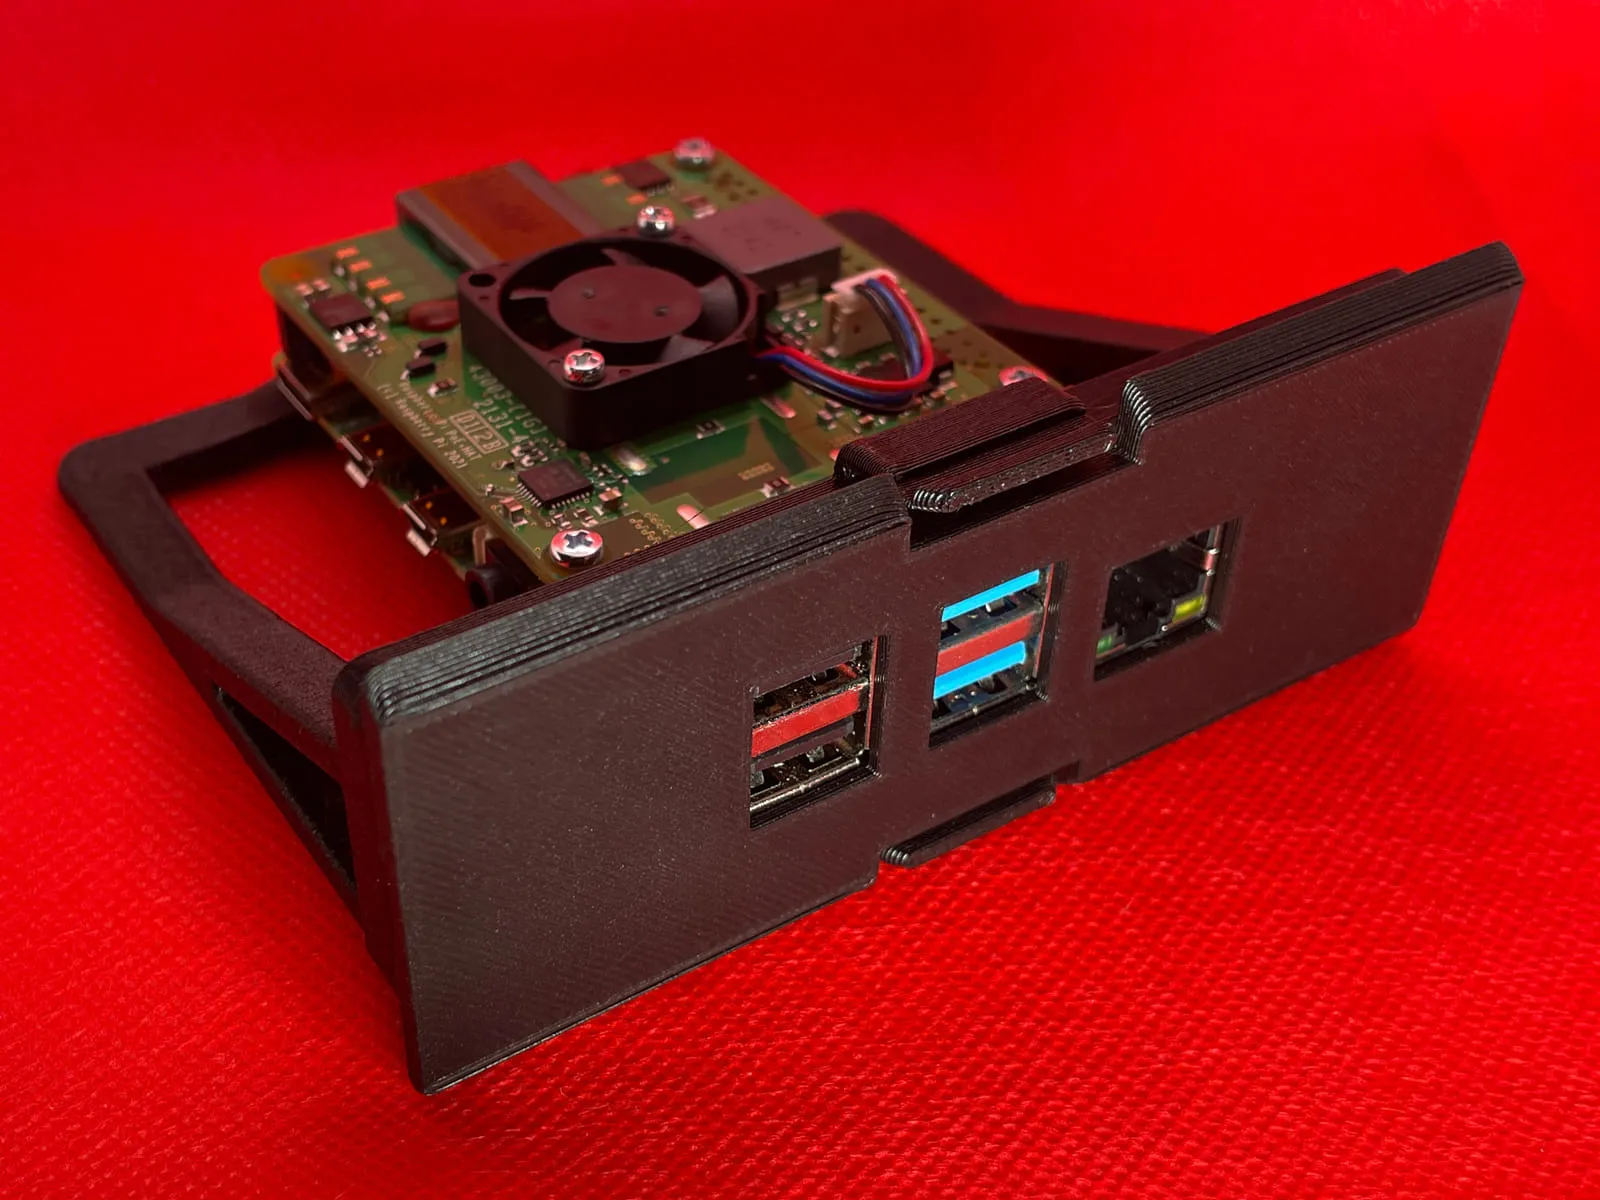
The module pops in and out easily, allowing quick access to the side ports and SD card if needed. However, I am using a PoE hat, so I don’t think I’ll be removing it much during its lifetime in the rack.
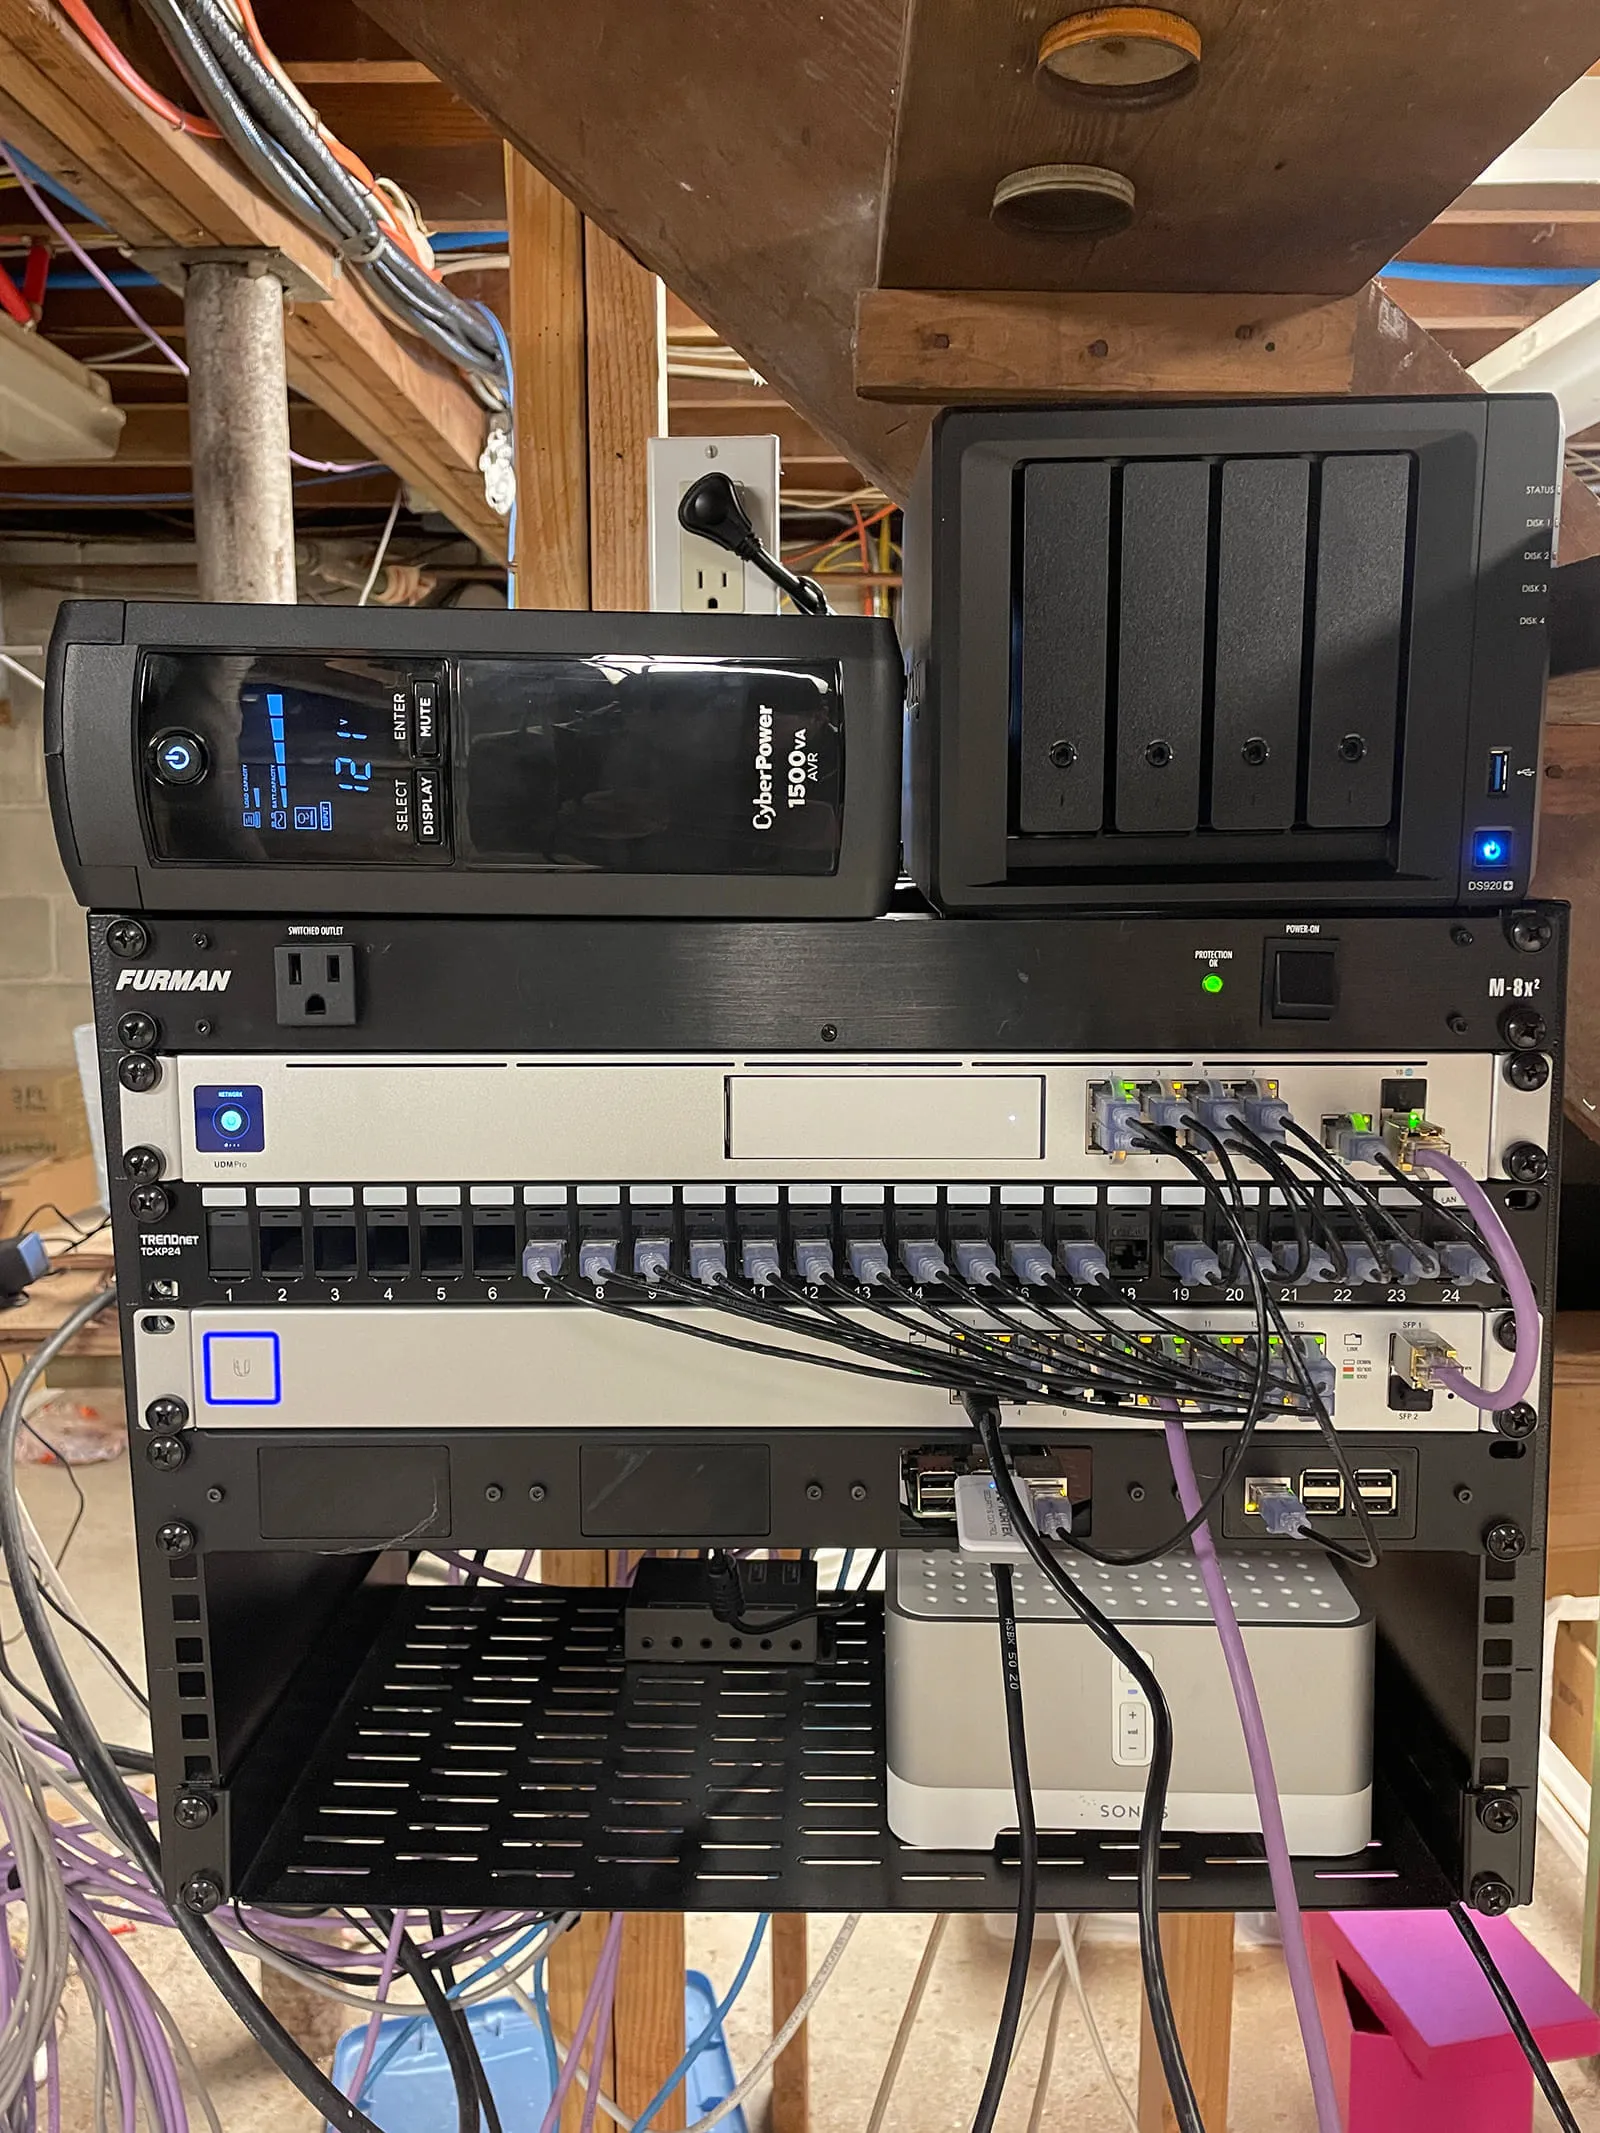
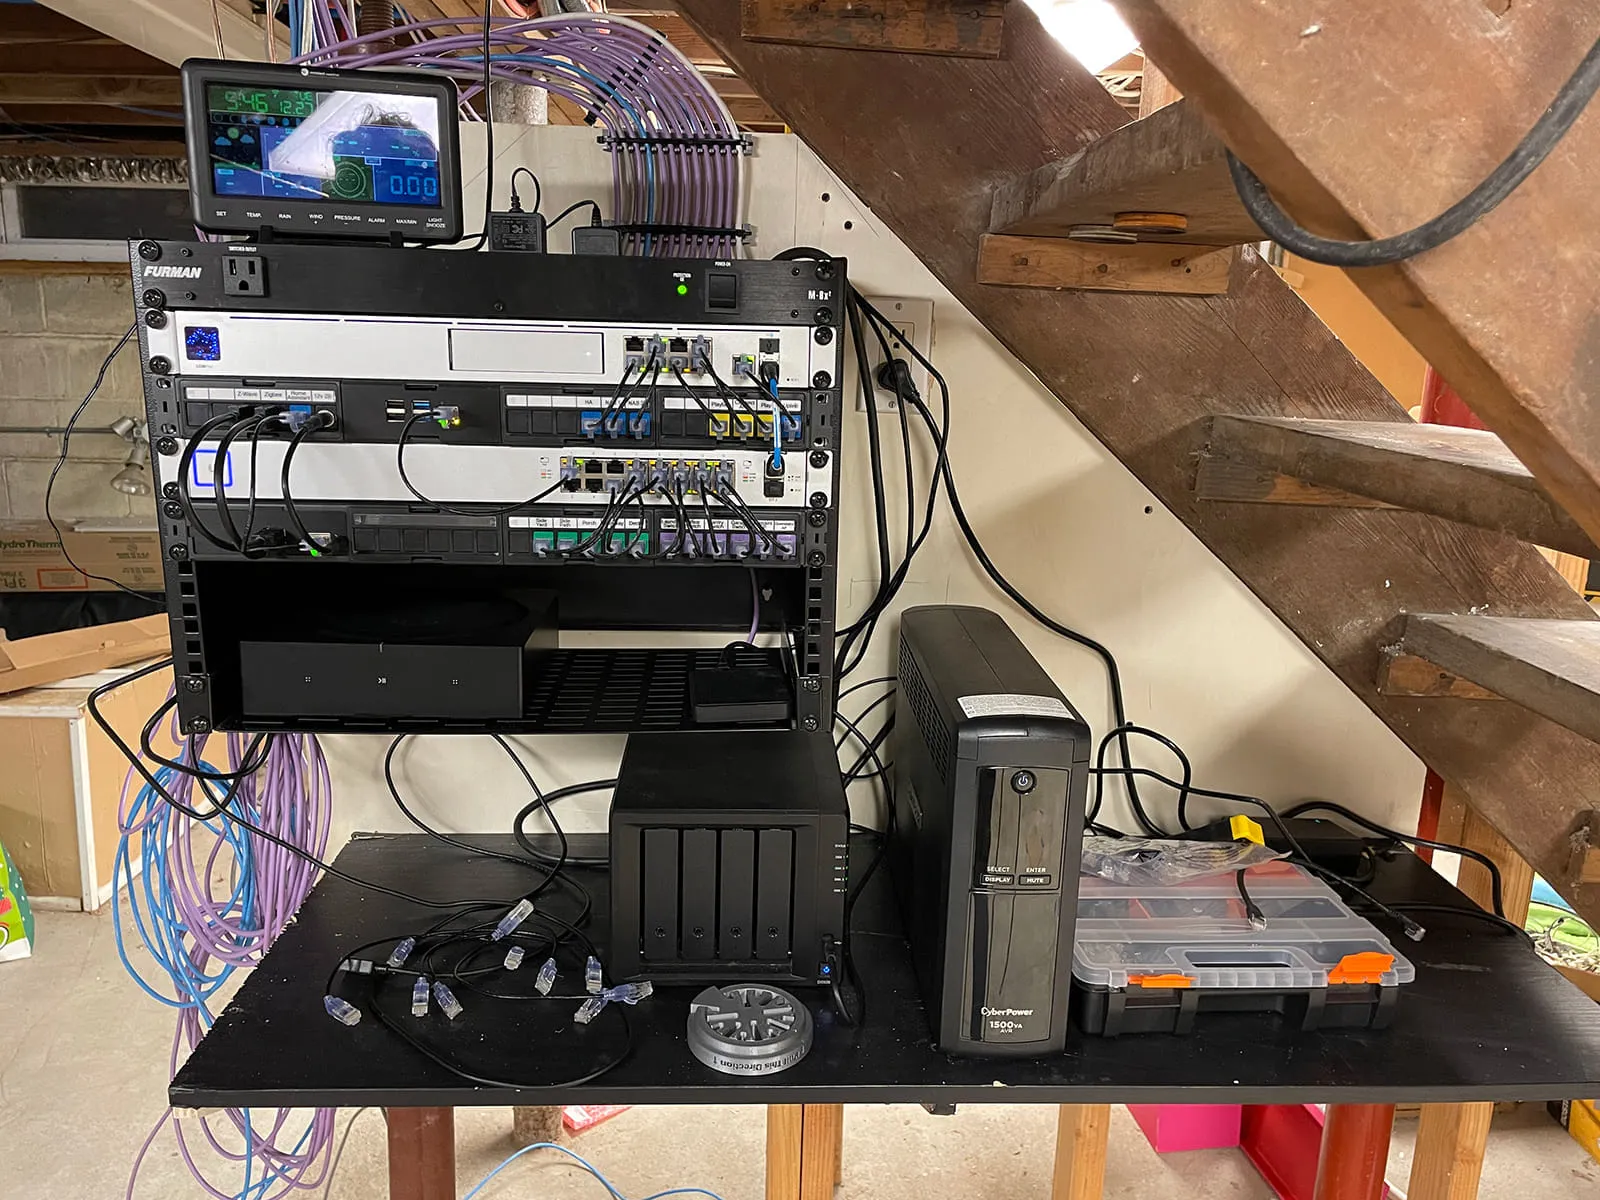
In addition to everything above, I made general improvements to the rack. Since the rack lives in my unfished basement, I added a backing sheet of plywood for better rack support and a place to attach cable management. I also added a shelf for the UPS and NAS to sit on instead of atop the rack.
I still have some cable management to do, but this is what the setup looks like now.
Going back to the list of problems to solve, I checked them all off.
- ✅ Fit everything neatly in the existing 8U rack
- ✅ Maximize horizontal space
- ✅ Rack-mounted HA Yellow and Raspberry Pi
- ✅ Neater patch cables
I love projects like this, where I can solve a problem with the combination of novel ideas, CAD, and 3D printing.
Found the above useful? Have a question? Thought of something I didn't?
Consider leaving a comment below or send me an email at johnzanussi@gmail.com.
You can also buy me a coffee. Cheers!

Comments