Creating an Animated Eye for a Painted Minions Pumpkin
🗓️ • ⏱️ 10 min read
🗓️ • ⏱️ 10 min read
Every year, my daughter Natalia’s elementary school hosts a pumpkin painting contest. The rules are simple: decorate a pumpkin your kid can carry into school and, most importantly, have fun as a family. Pumpkins are brought in two days before Halloween, the kids vote on them the day before Halloween, and they stay on display at school until after the holiday. Voting is done with spare change, which is donated to a local family in need. At the end of the voting, a winner is selected.
As a family, we’ve participated in the contest for the past two years. Two years ago, Natalia and I worked on recreating the house from Up, complete with balloons. Last year, Natalia and my wife teamed up to make a mermaid pumpkin. Unfortunately, neither submission fared particularly well in the voting.
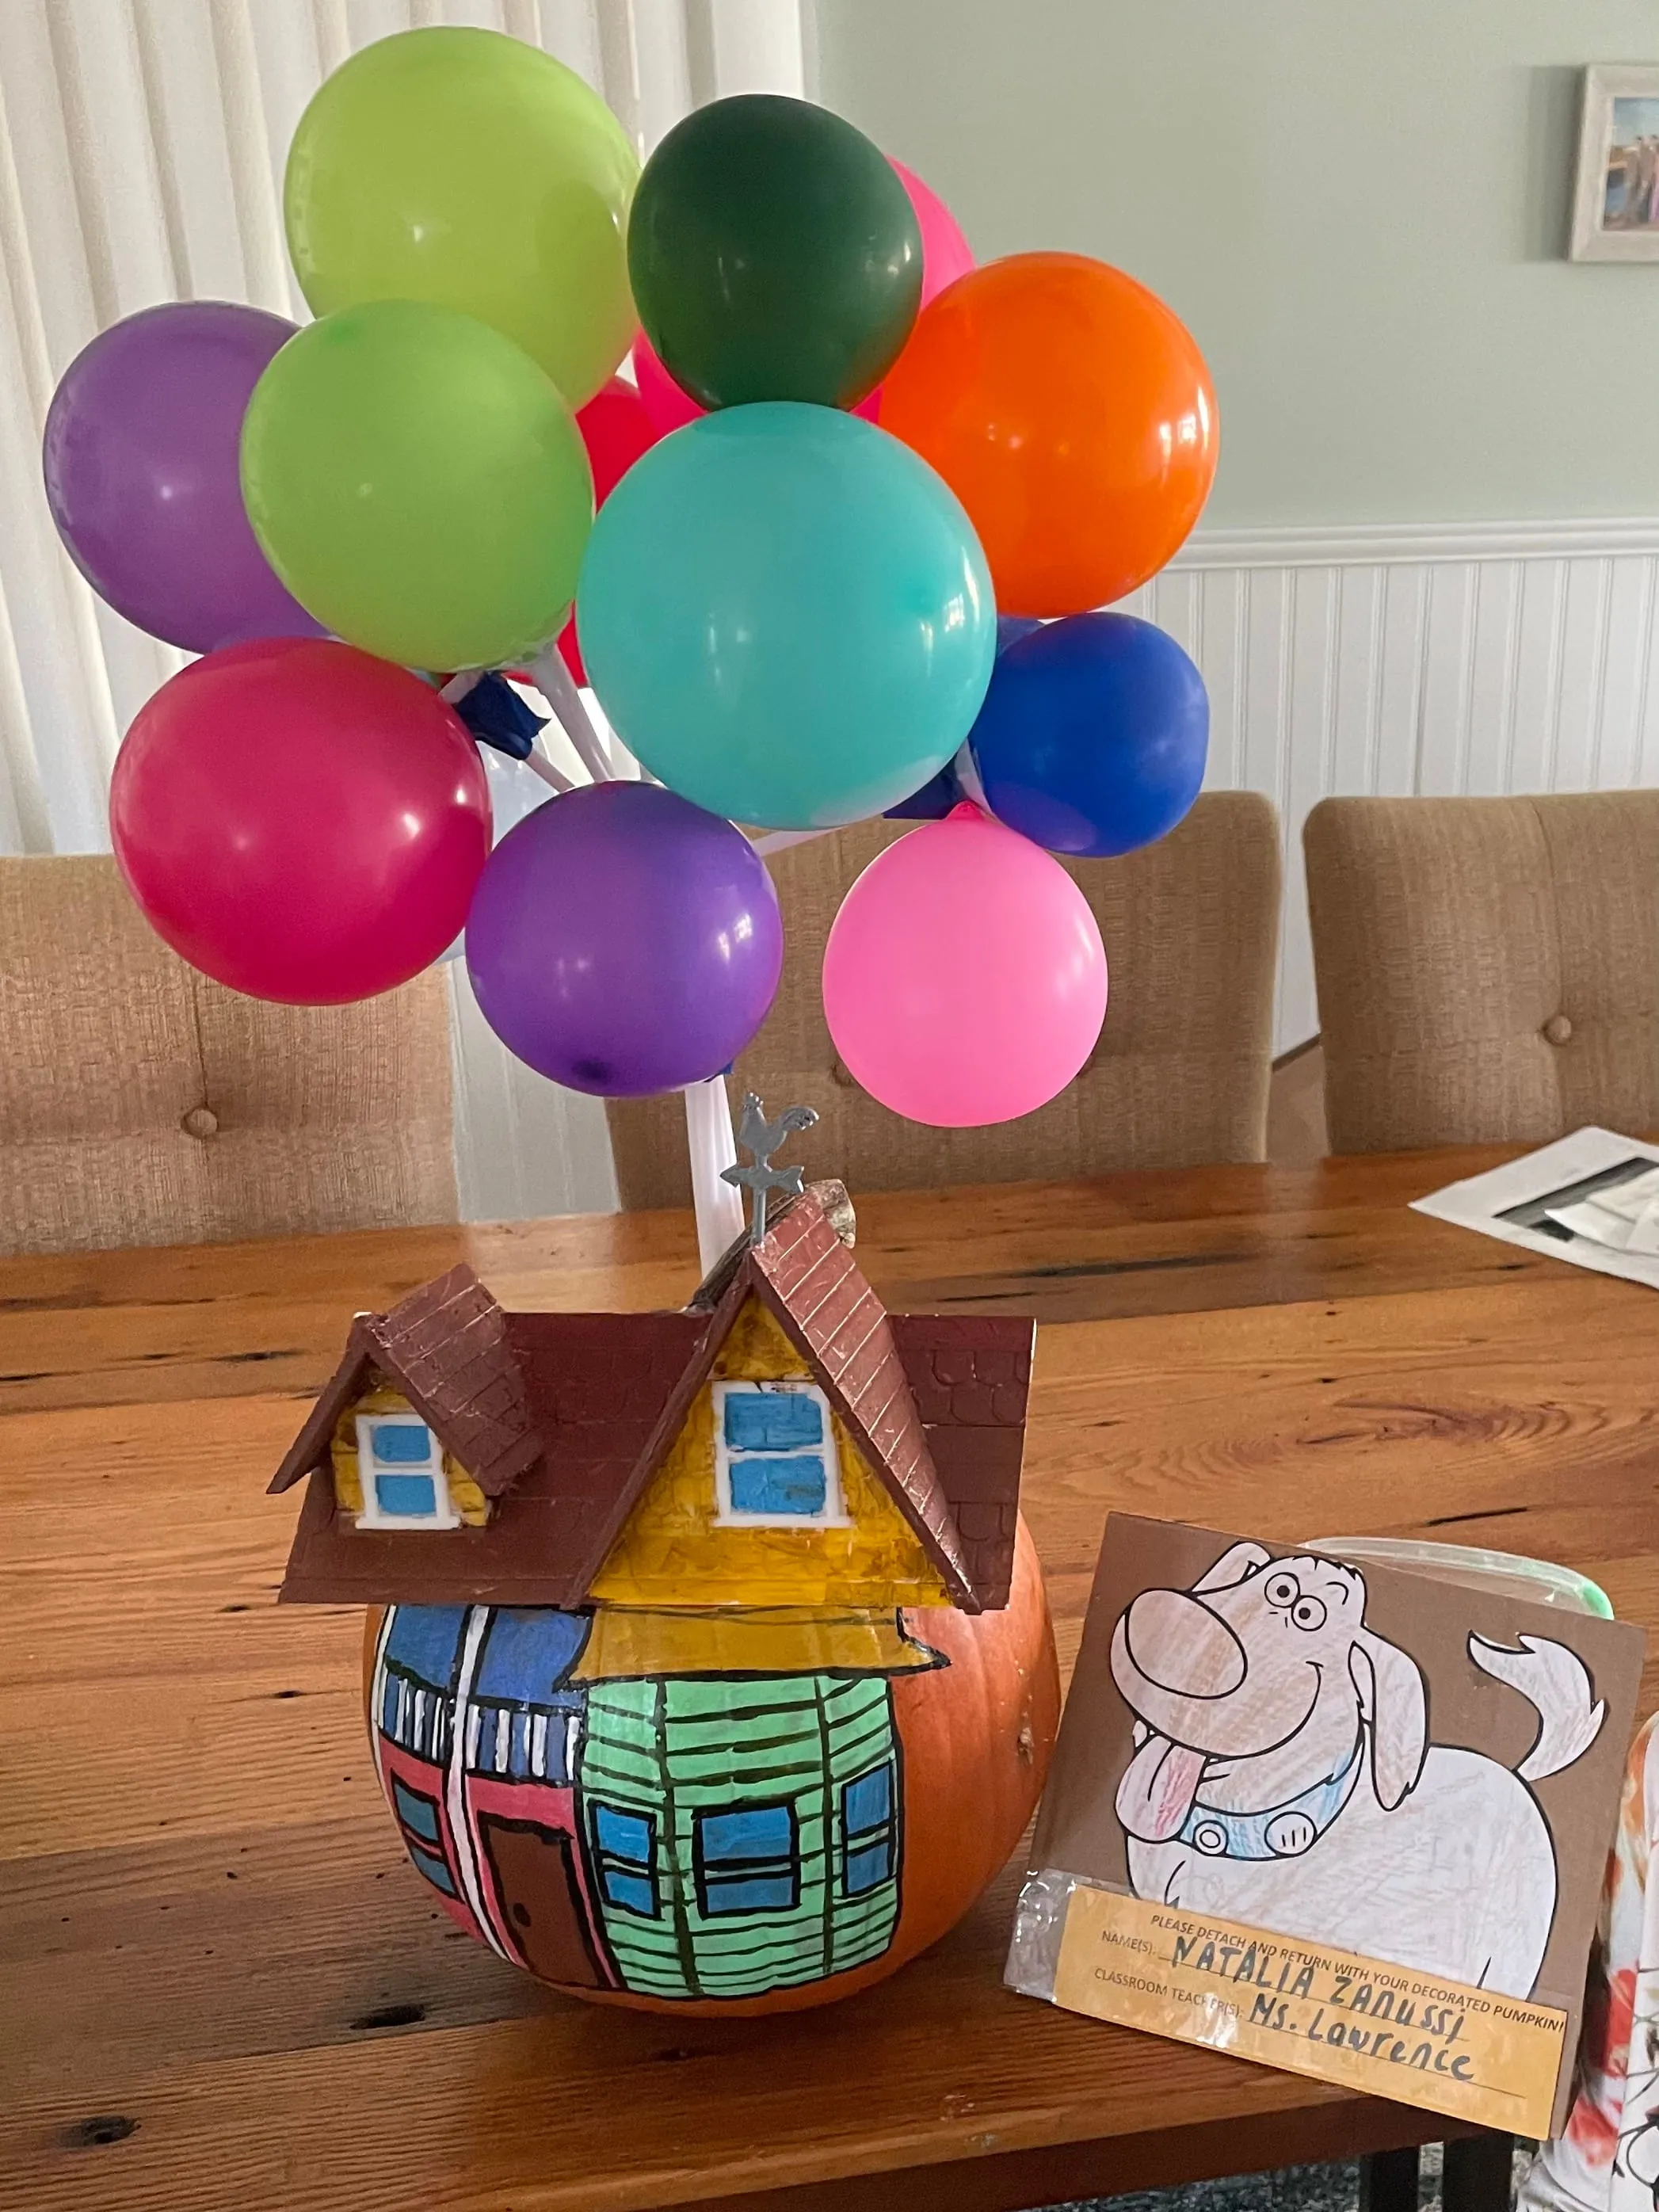
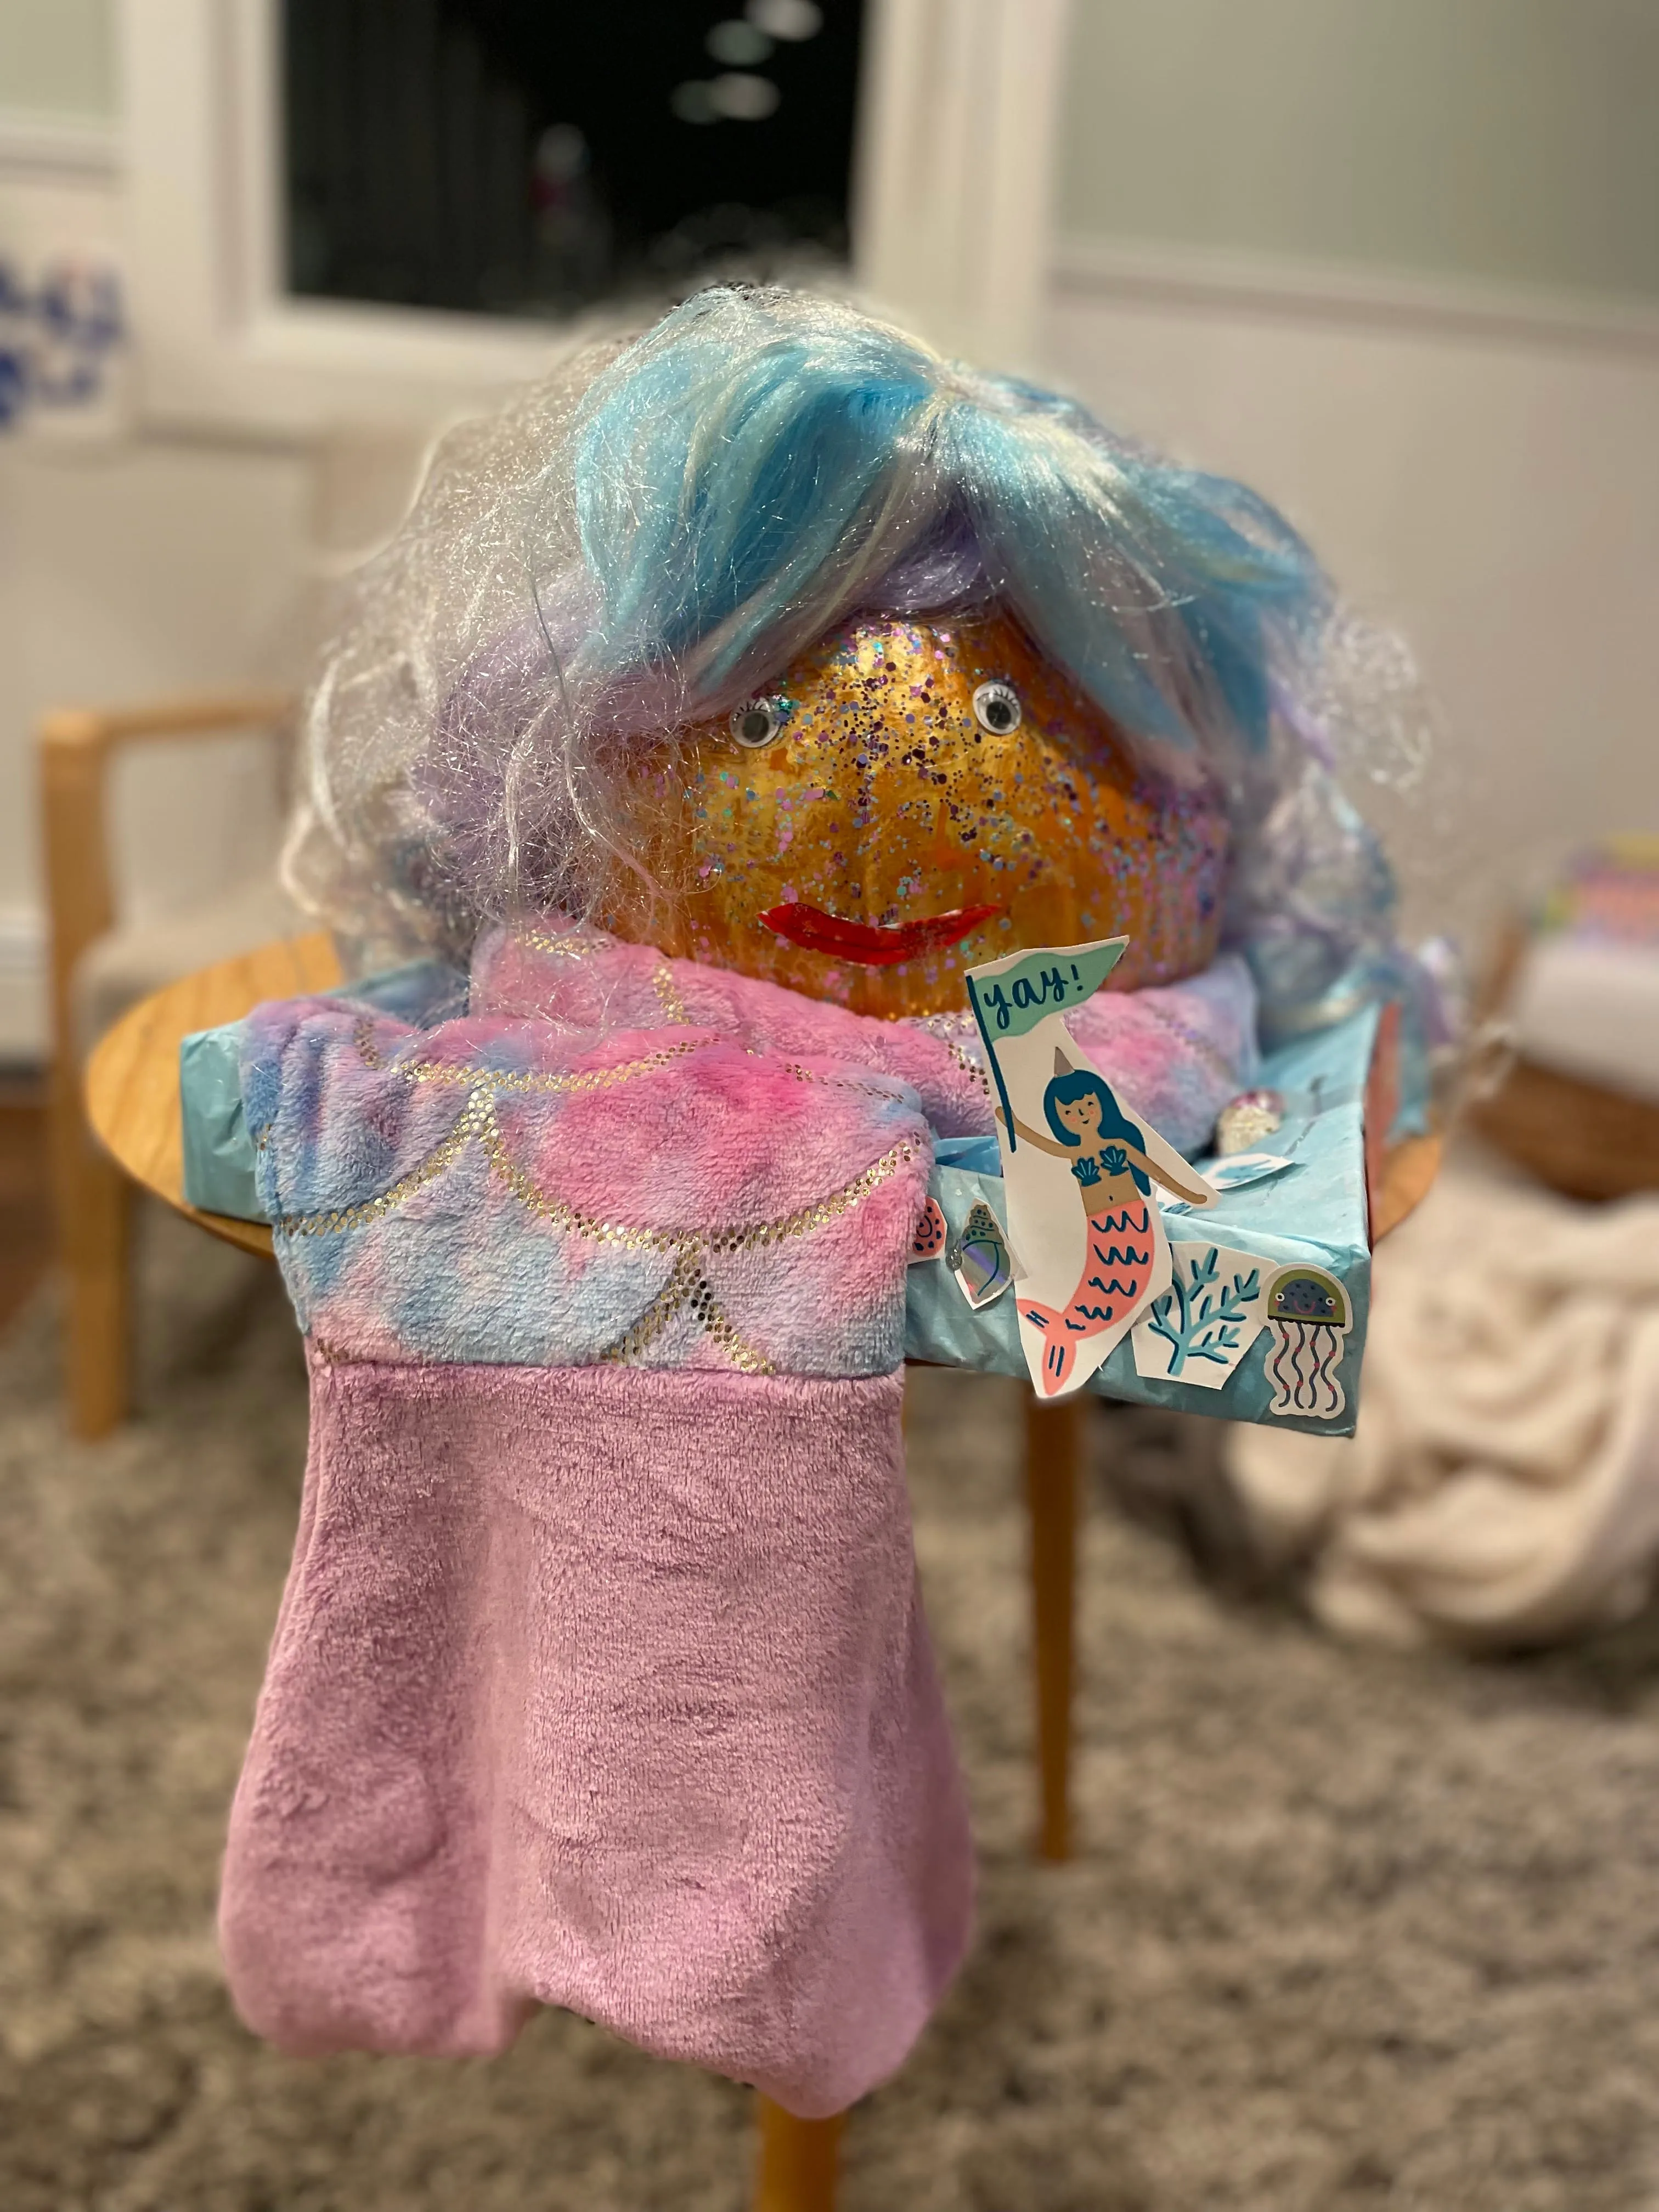
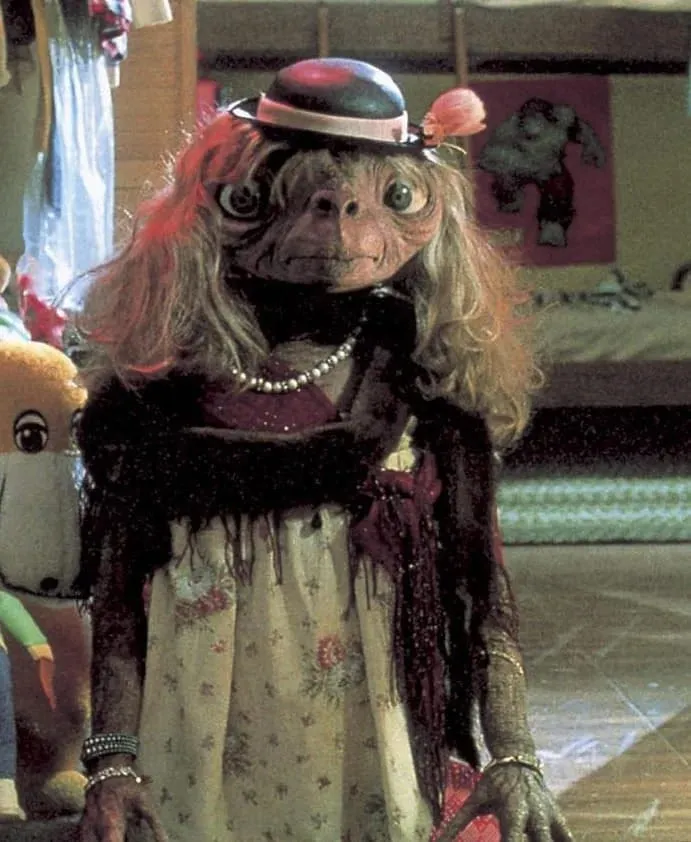
Looking back, the painting on the Up pumpkin wasn’t our best work, and while kids might not have noticed, all I could see in my wife’s mermaid pumpkin was E.T wearing a wig.
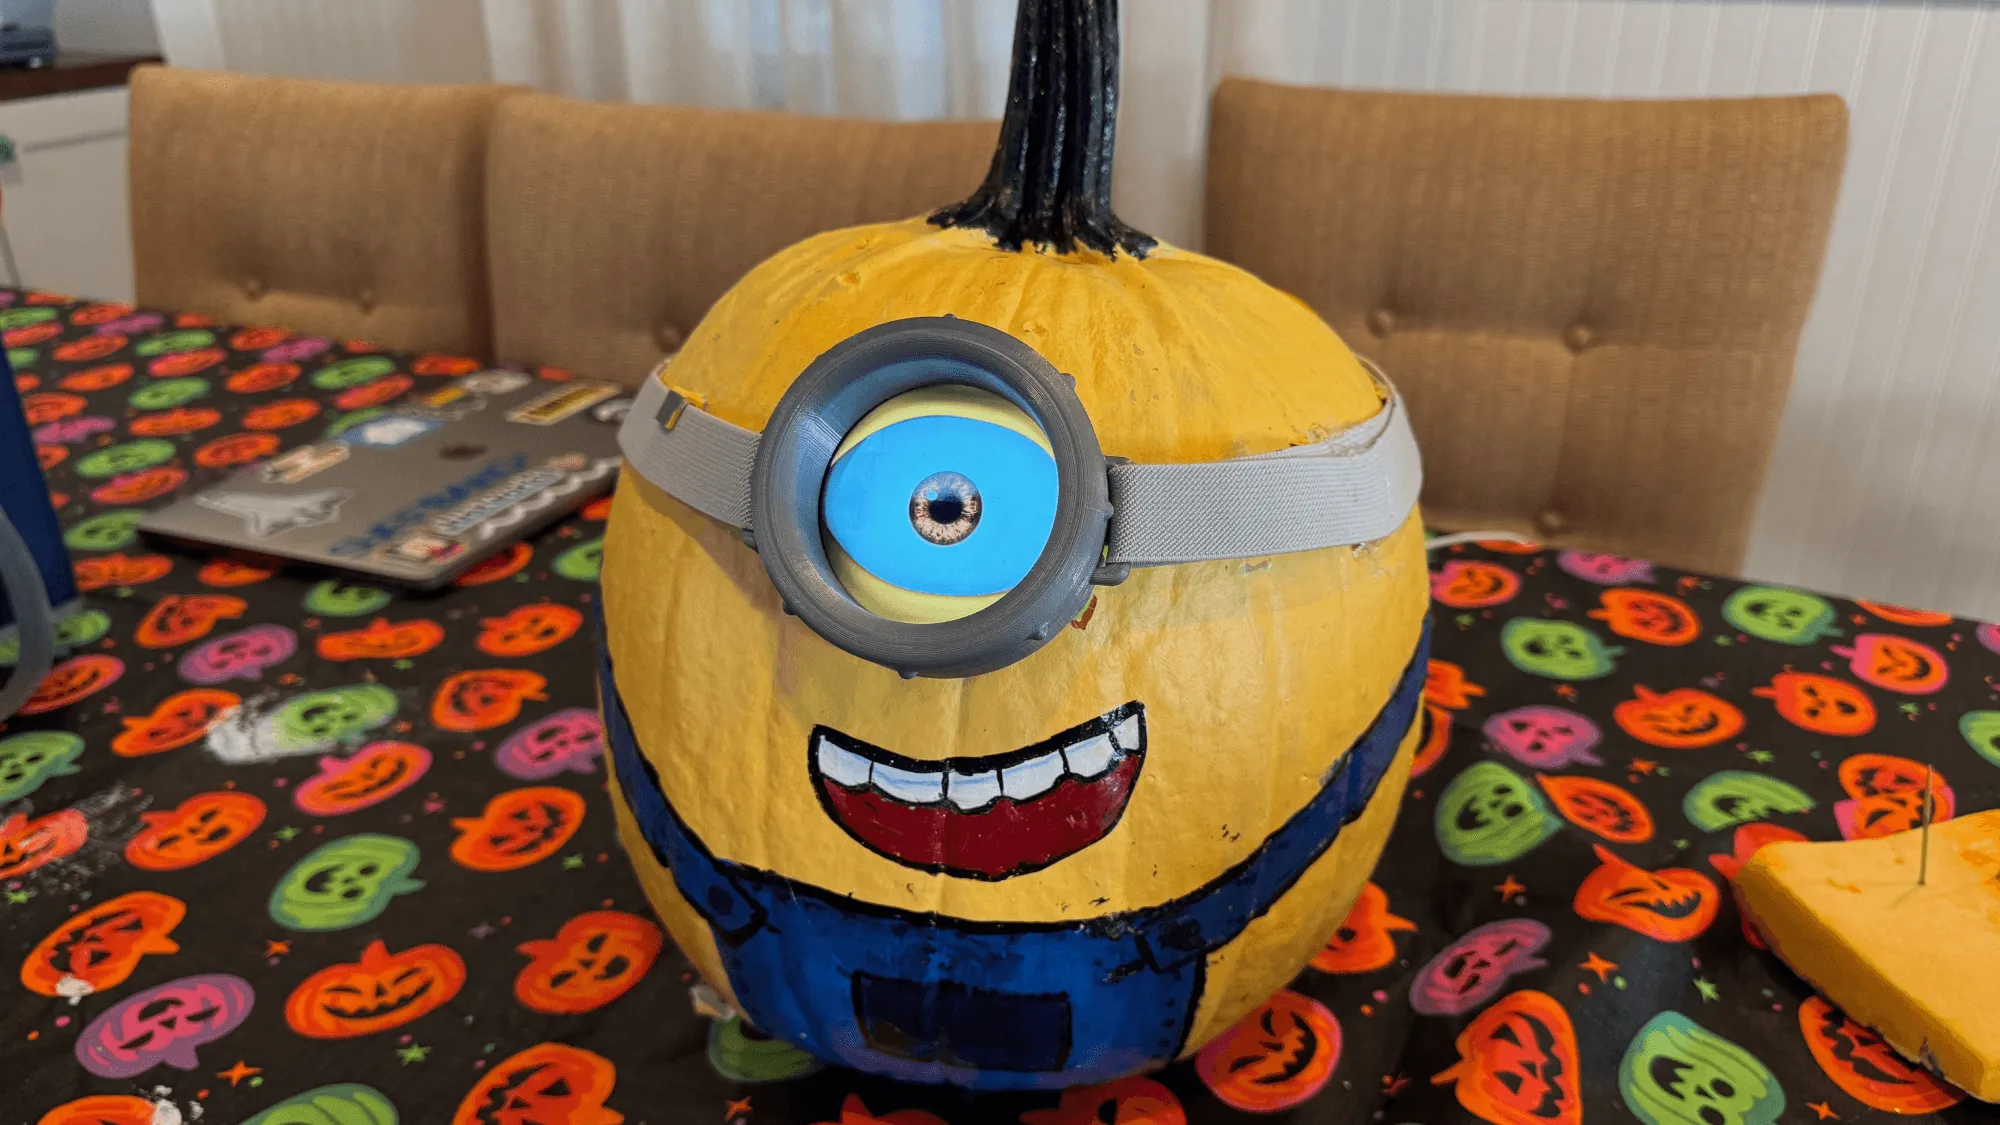
This past summer, I took Natalia and one of her friends to see Despicable Me 4 in theaters. Even though it was only July, halfway through the movie, I found myself thinking about how perfect a Minion pumpkin would be for this year’s contest—specifically one with an animated eye.
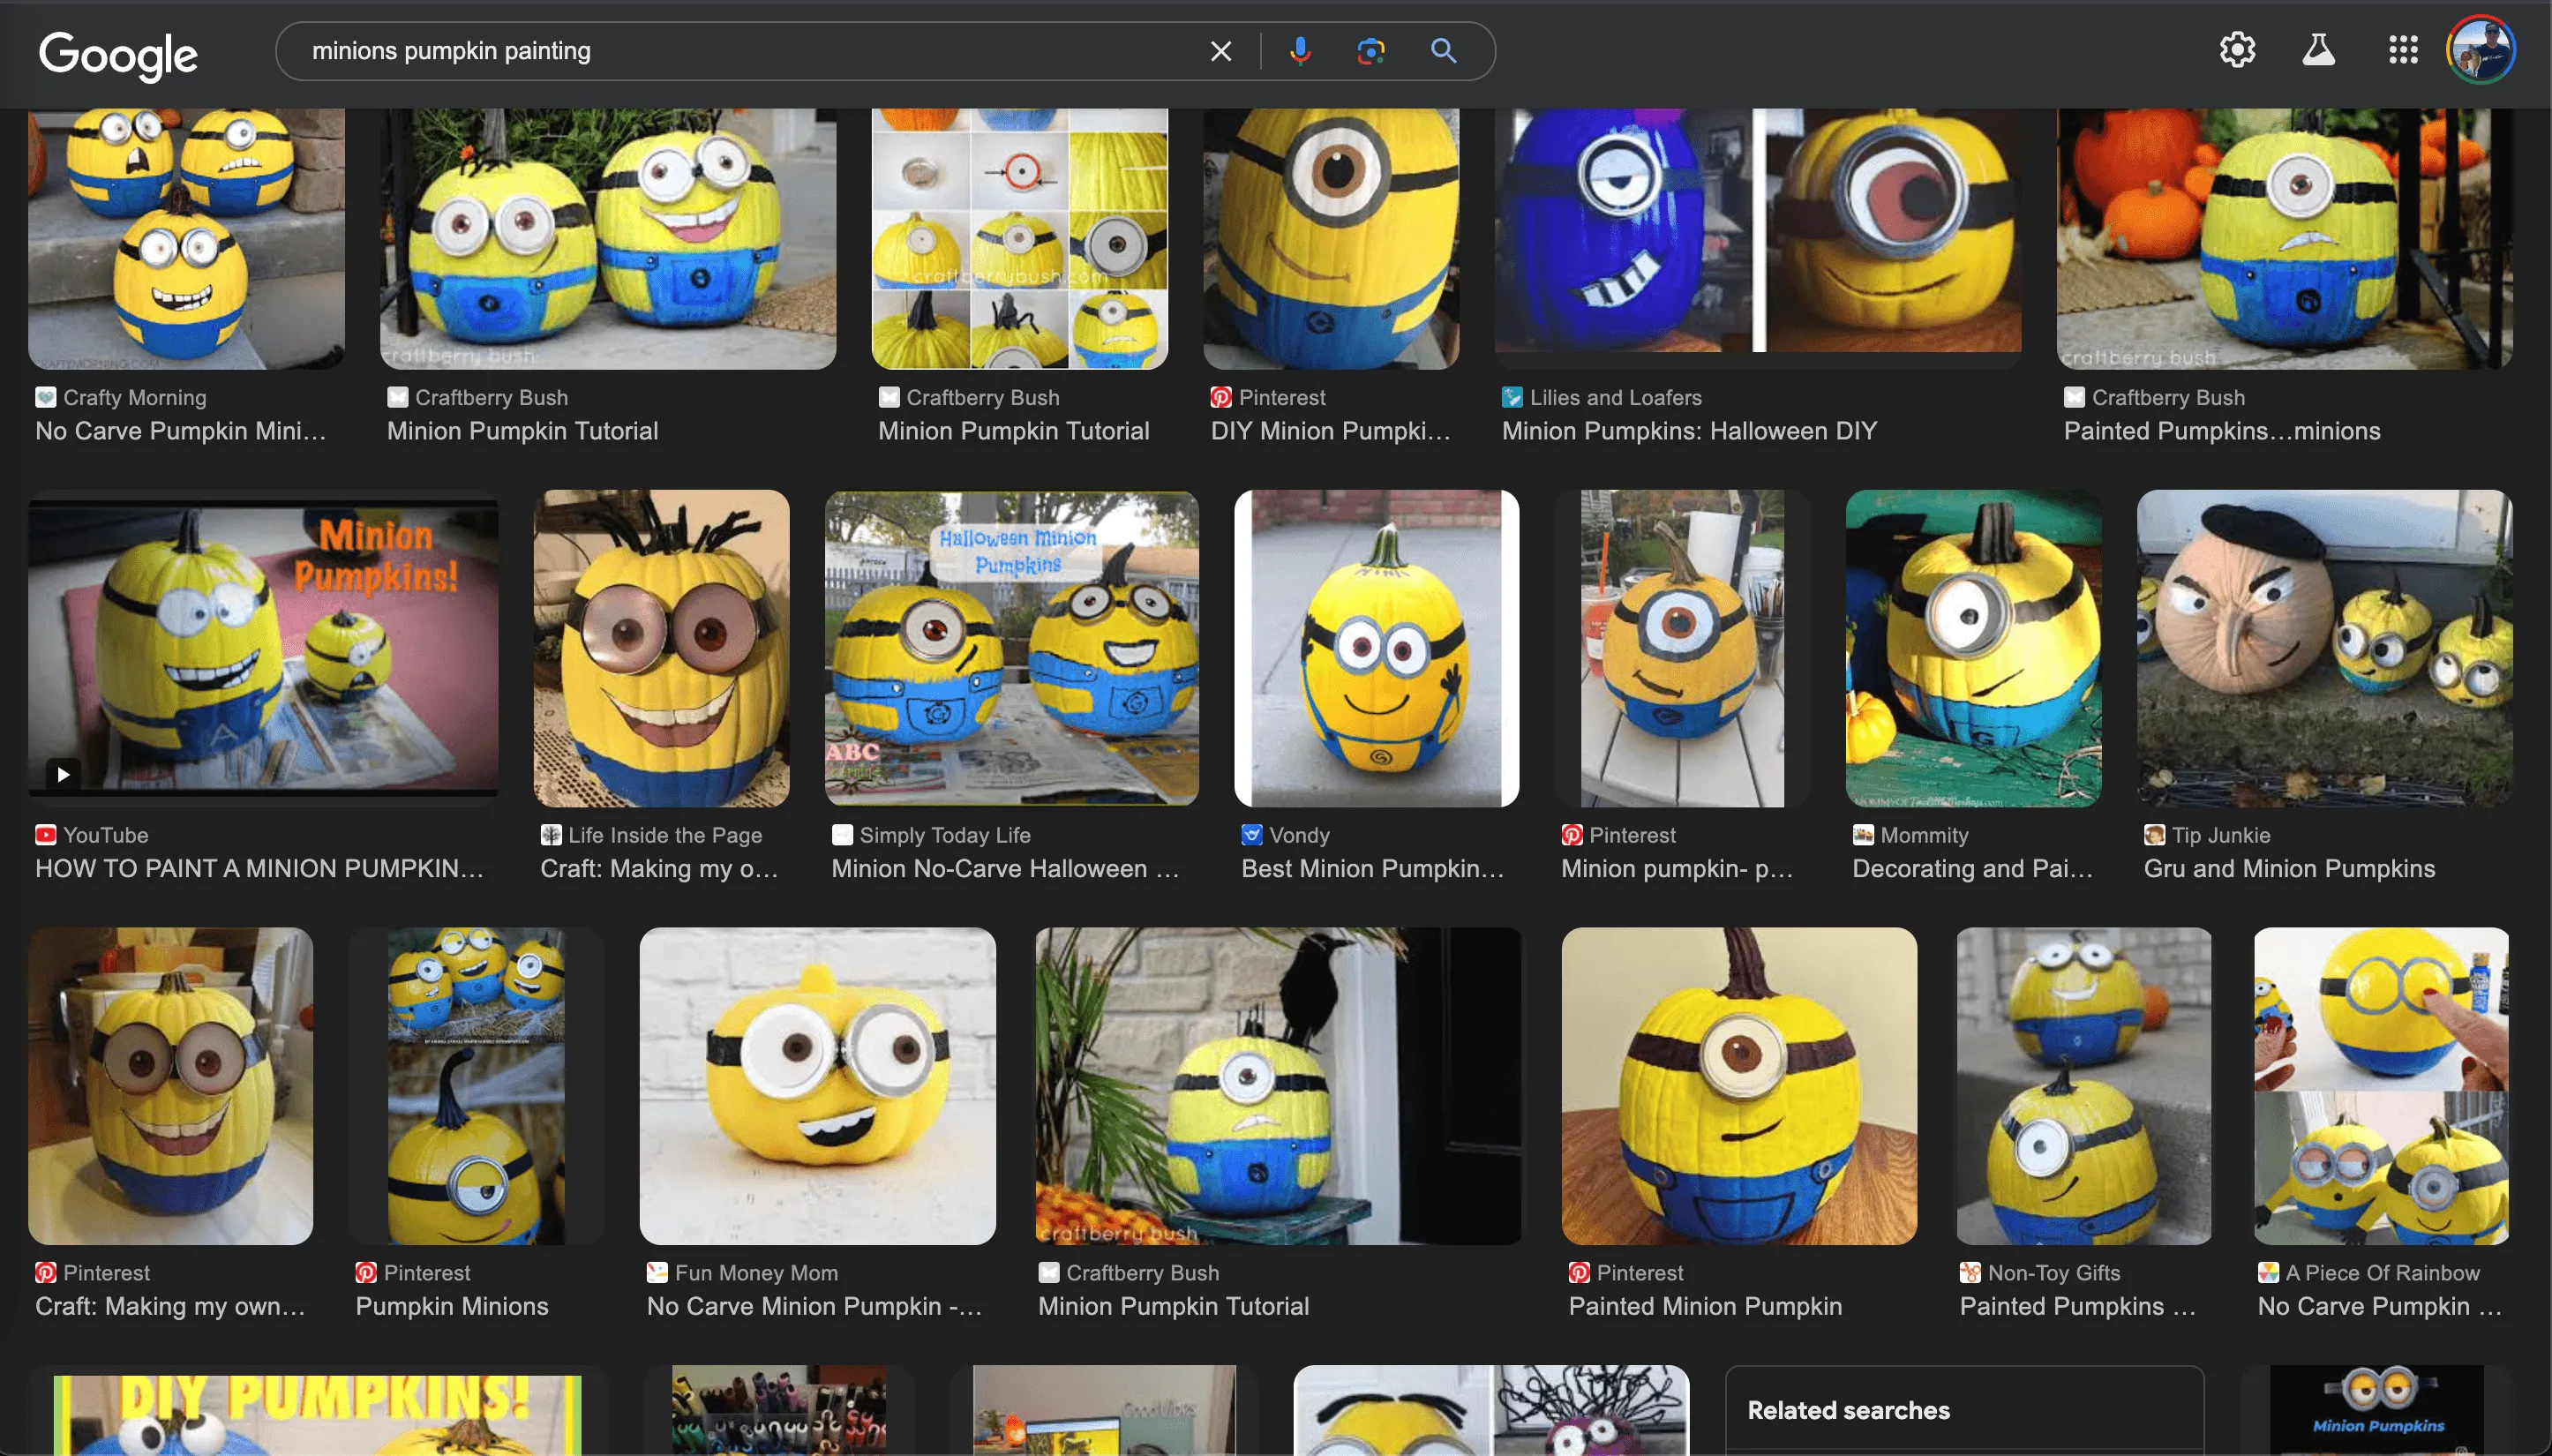
Of course, painting a Minion pumpkin has been done a million times over. But after a quick Google search, I realized no one had combined the classic Minion look with an animated eye. I was up for the challenge.
In the middle of summer, I started brainstorming. I’ve been tinkering with electronics and 3D printing for a few years now, so I figured this project would be the perfect way to combine those skills. The idea seemed doable, and I already had some components on hand. Over the next few months, I spent time tinkering with electronics, designing and 3D printing CAD models, and writing and testing code.
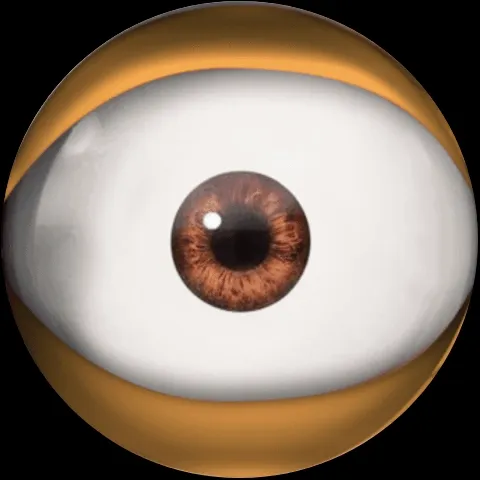
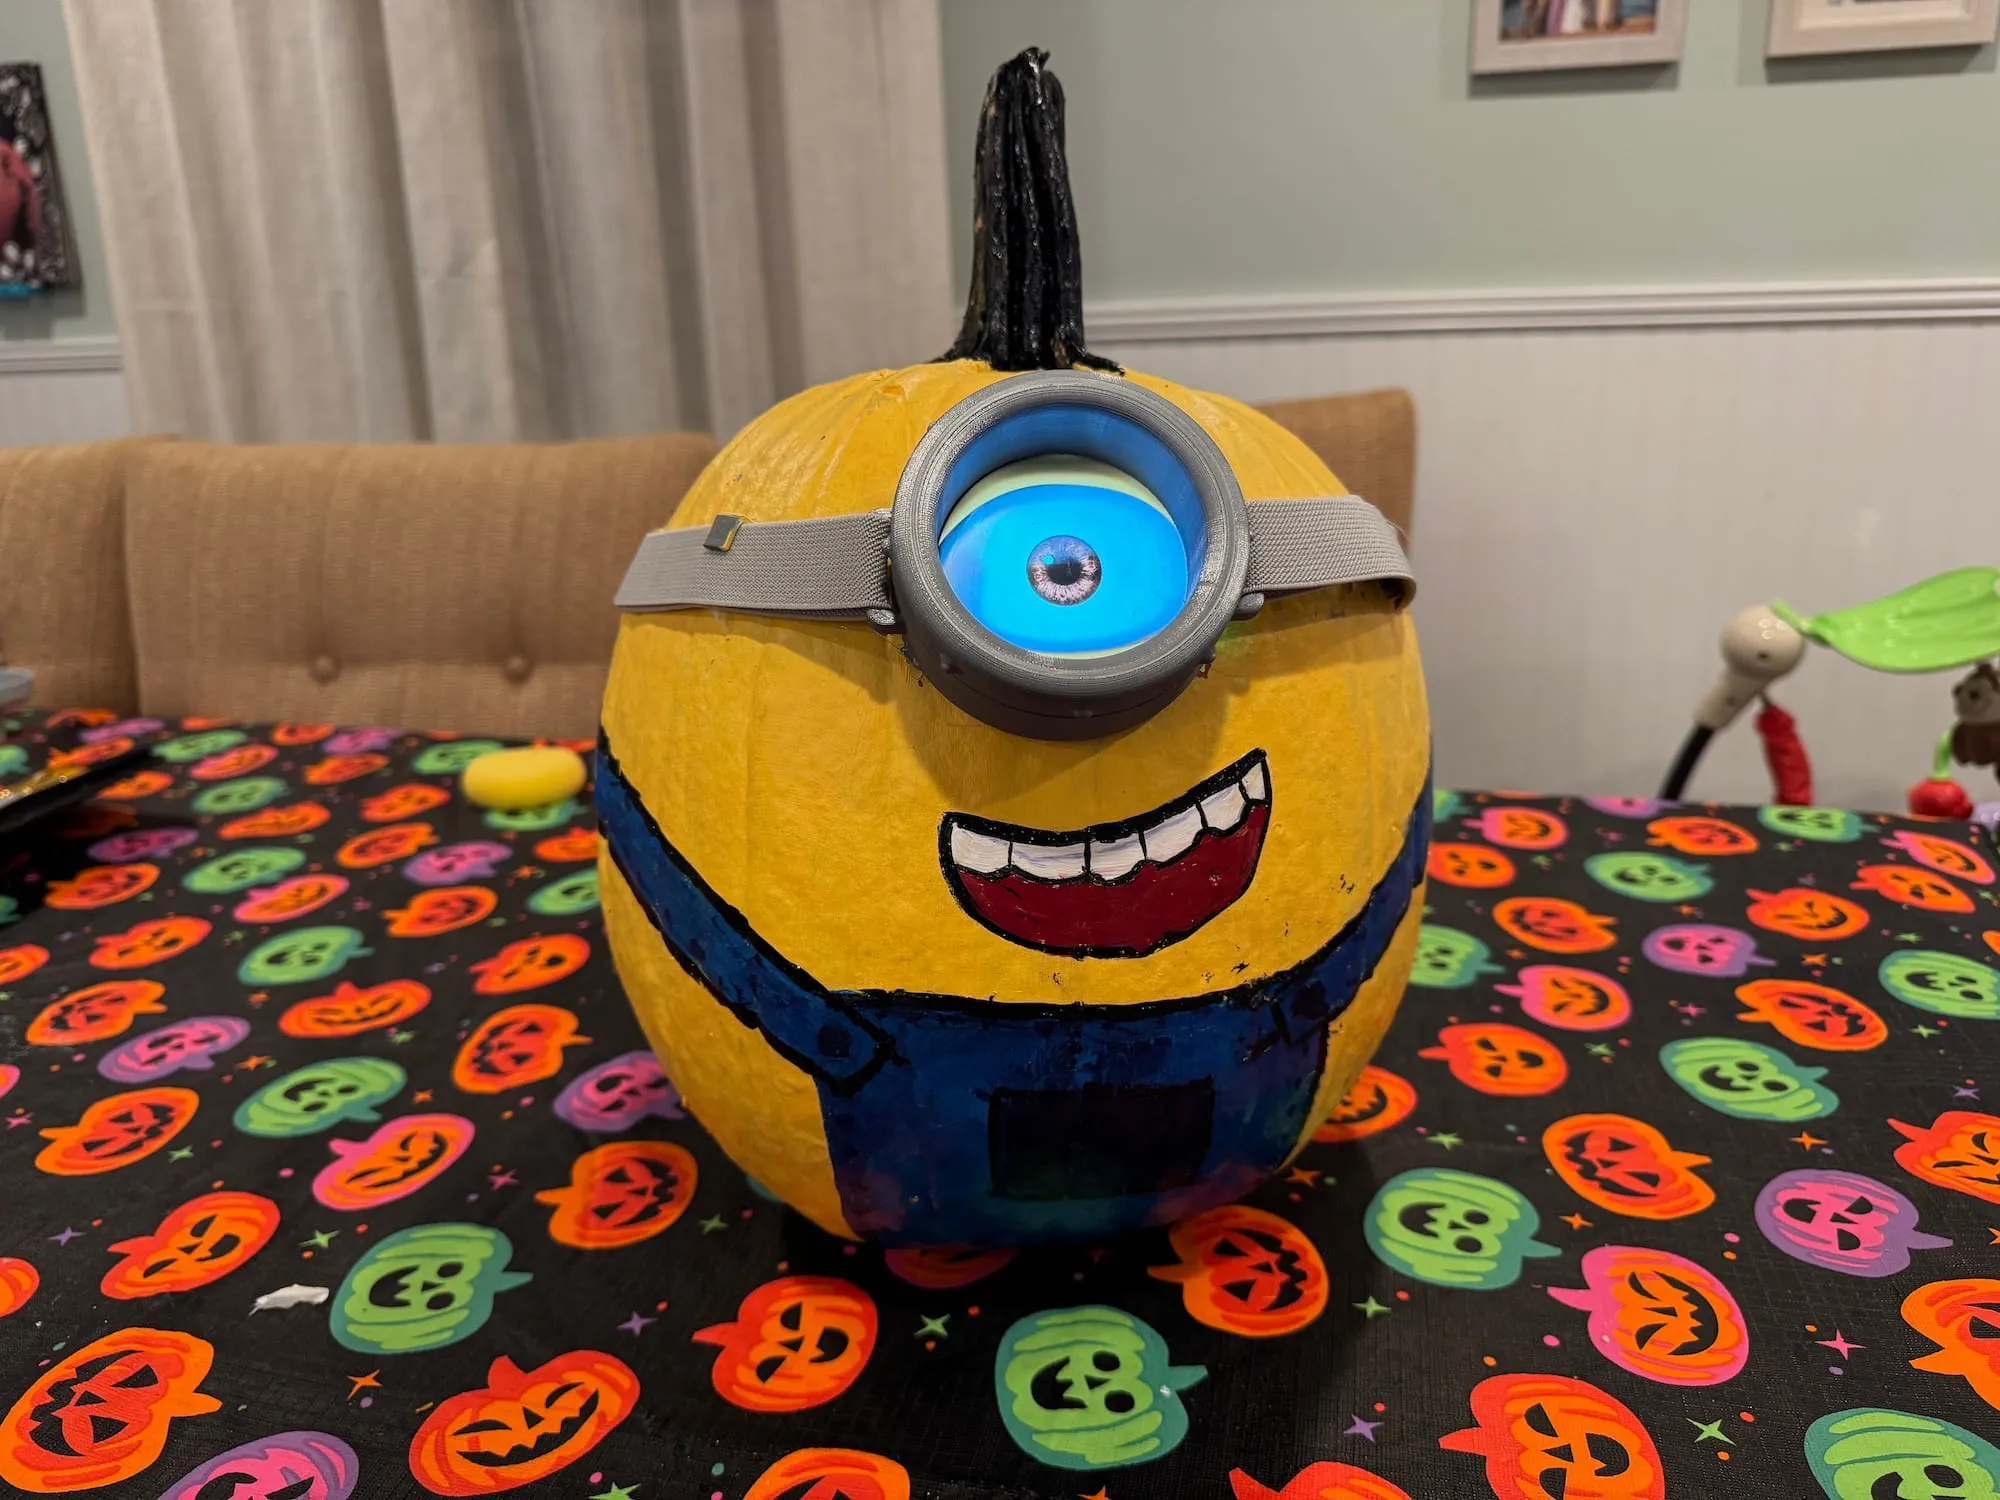
In the end, I used a Raspberry Pi Zero 2 W, a 2.8 inch round display I found on Amazon, animated GIFs of an eyeball I commissioned on Fiverr, code I wrote, and 3D prints Natalia and I designed to create exactly what I had envisioned over the summer.
The night before the submission deadline, Natalia and I painted the pumpkin to look like a Minion. Once the paint dried, we tested the electronics for the last time. Everything worked perfectly. On Tuesday, Natalia carried the finished pumpkin into school, and it was up to the students at her school to decide our fate.
On Halloween, Natalia was so excited as she stepped off the bus, proudly showing us the winning certificate. Sharing this project with her was so much fun. Natalia loves creating as much as I do, and involving her in the CAD, 3D printing, and electronics made the experience even more special.

Now let’s get into what exactly I used and how I connected it all together to create this award winning masterpiece. 😉
Like many of my other projects, I already had most of these parts on hand.
If you’re looking to power the system on a battery bank I would suggest adding a relay so that the Pi can turn the screen on and off on a fixed schedule to save power. If not, you can skip the relay and battery bank all together.
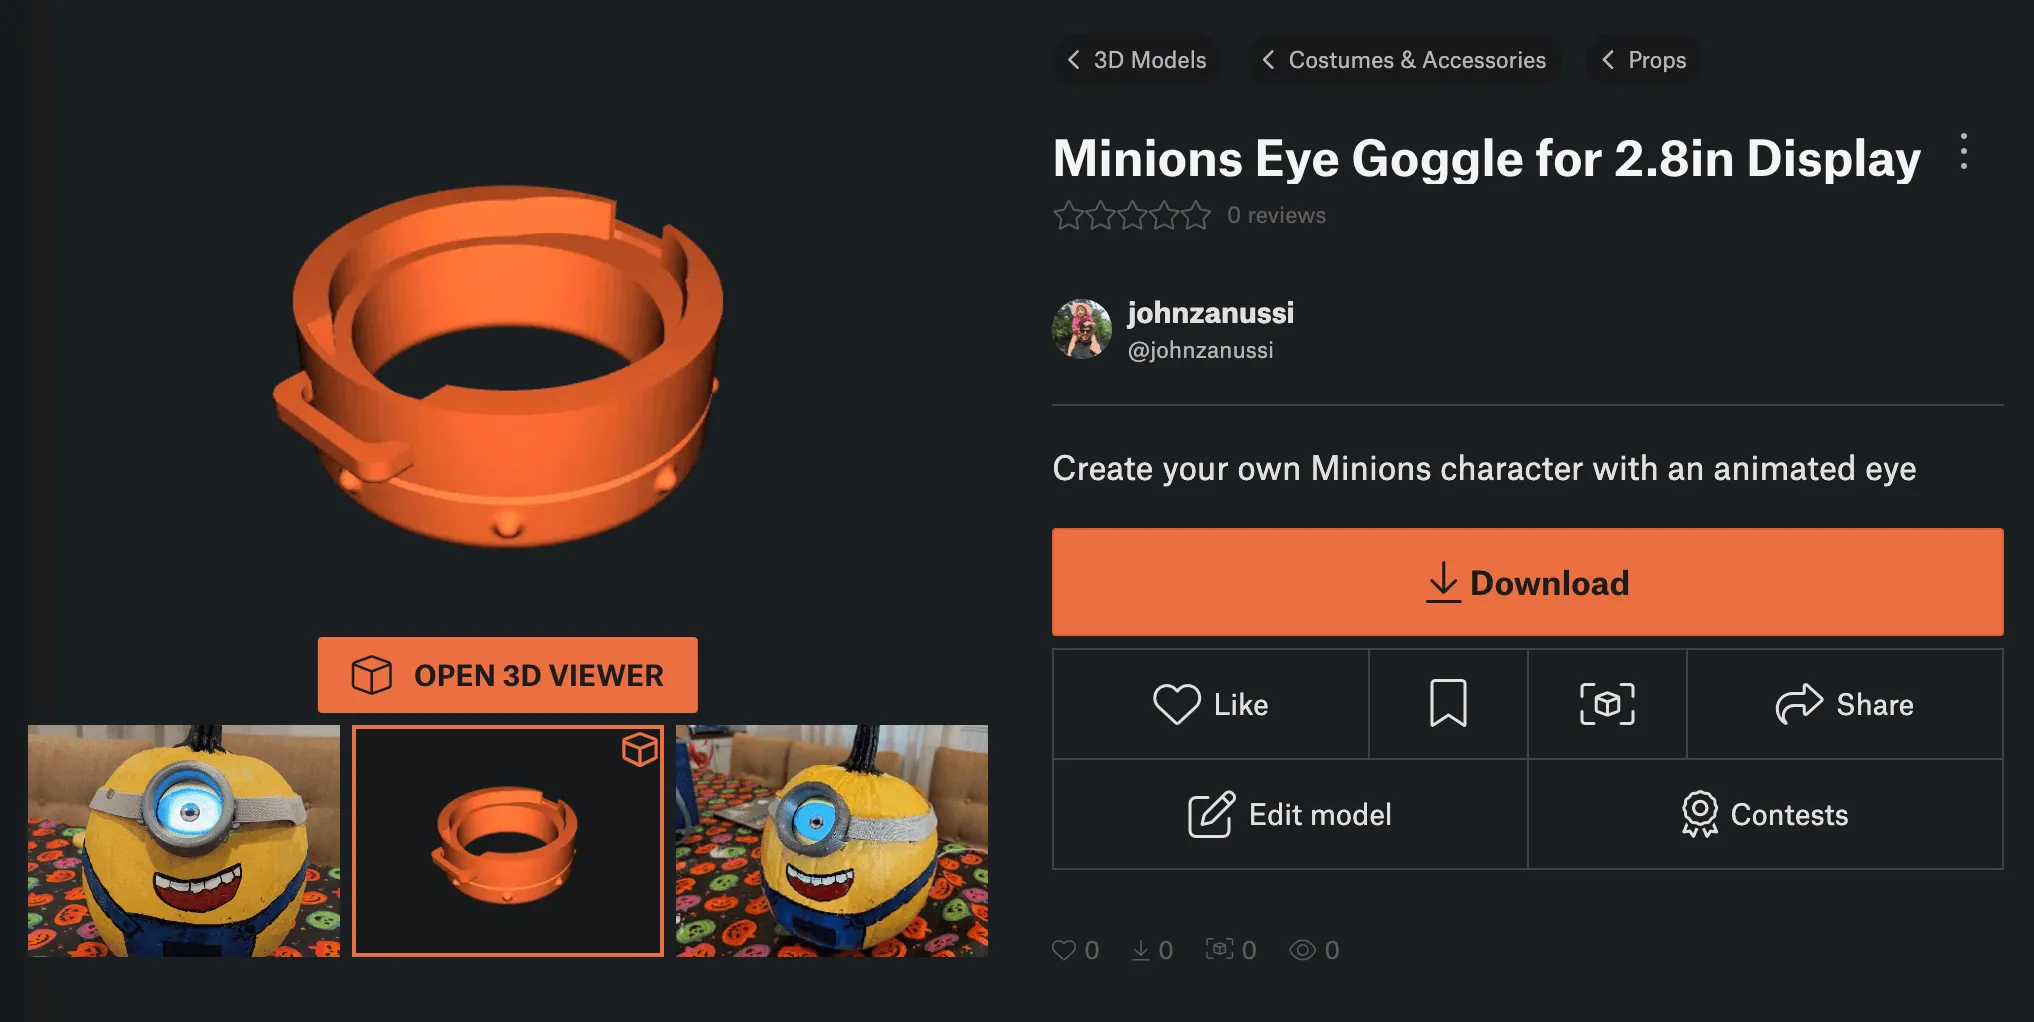
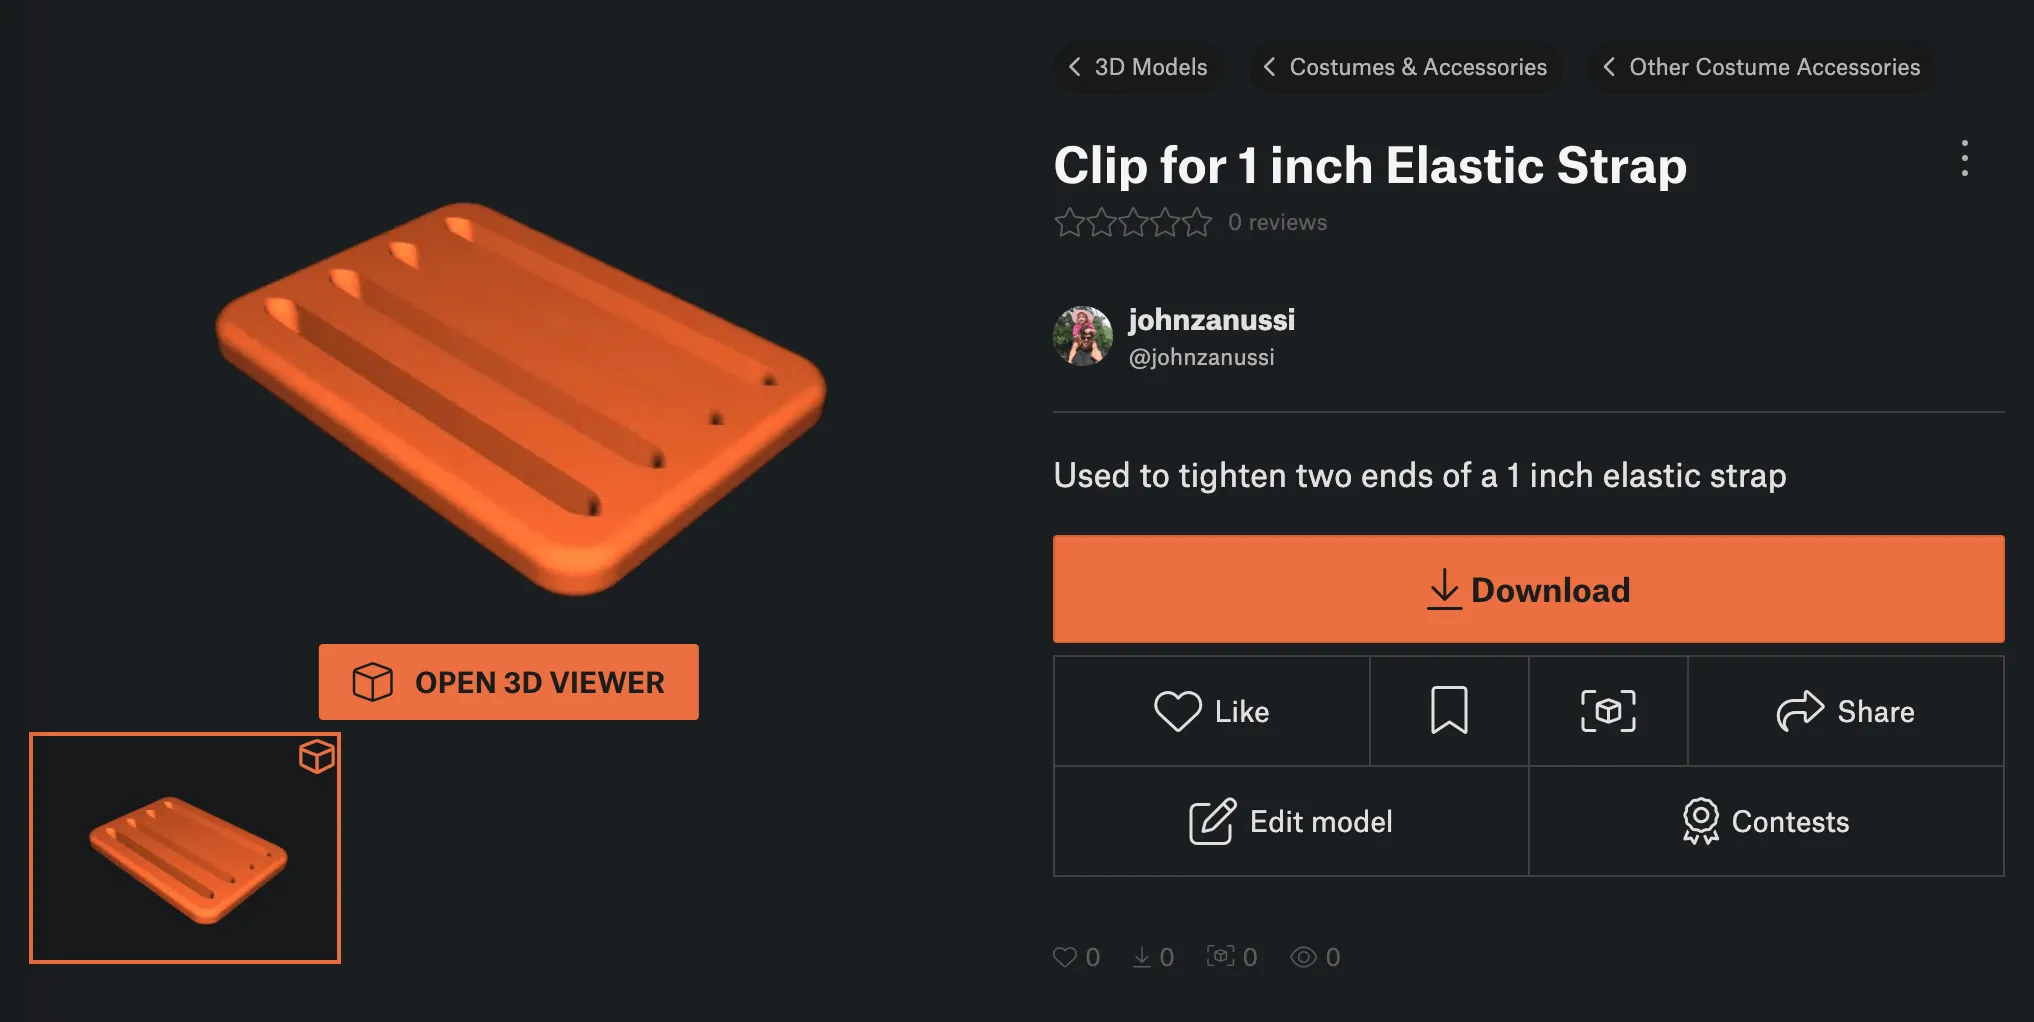
I created the following models for this project. Both models are available for free on Printables.com in STL and Fusion360 formats.
The goggle frame was modeled to look like what the Minion’s wear. There is a recessed space on the underside to fit the 2.8 inch display linked above. The holes on each side are just wide enough to fit the 1 inch elastic strap through.
This is used to tie together the two ends of the elastic strap. There is enough friction between the elastic and the print to keep the tension.
The following code handles both the playing of the animated gifs and the scheduling for turning the screen on and off. If you don’t plan on using the scheduling you can simply set SCHEDULE to False on line 9. There are other variables available for customizing the schedule and the GPIO pin used for the controlling the relay.
We’ll use this code further down in the Raspberry Pi Setup section.
import pygamefrom PIL import Imageimport randomimport osimport RPi.GPIO as GPIOimport schedule
# Configuration for scheduled GPIO controlSCHEDULE = True # Enable/disable schedulingSCHEDULE_ON = '07:00' # Time to turn the relay ONSCHEDULE_OFF = '19:05' # Time to turn the relay OFFGPIO_PIN_FOR_RELAY = 26 # GPIO pin used to control the relay
if SCHEDULE: # Initialize GPIO in BCM (Broadcom pin numbering) mode GPIO.setmode(GPIO.BCM) GPIO.setup(GPIO_PIN_FOR_RELAY, GPIO.OUT)
# Define function to set the GPIO pin HIGH (activate relay) def set_pin_high(): GPIO.output(GPIO_PIN_FOR_RELAY, GPIO.HIGH) print(f"GPIO {GPIO_PIN_FOR_RELAY} set to HIGH ({SCHEDULE_ON})")
# Define function to set the GPIO pin LOW (deactivate relay) def set_pin_low(): GPIO.output(GPIO_PIN_FOR_RELAY, GPIO.LOW) print(f"GPIO {GPIO_PIN_FOR_RELAY} set to LOW ({SCHEDULE_OFF})")
# Schedule tasks to run at specified times schedule.every().day.at(SCHEDULE_ON).do(set_pin_low) # Deactivate relay at SCHEDULE_ON schedule.every().day.at(SCHEDULE_OFF).do(set_pin_high) # Activate relay at SCHEDULE_OFF
# Initialize pygame for display and graphics handlingpygame.init()
# Set up a 480x480 window for displaying GIFsscreen = pygame.display.set_mode((480, 480))
# List of GIF files with their respective weights for random selectiongif_files = [ ("blink.gif", 3), # More likely to be chosen (weight 3) ("look-left.gif", 1), ("look-right.gif", 1),]
# Function to load and process a GIF file into pygame-compatible framesdef load_gif(gif_path): gif = Image.open(gif_path) # Open the GIF file frames = [] # List to store individual frames frame_durations = [] # List to store frame durations
# Extract and process each frame for frame in range(0, gif.n_frames): gif.seek(frame) # Go to the specific frame frame_image = gif.convert("RGBA") # Convert to RGBA for pygame compatibility
# Rotate the frame 90 degrees counterclockwise rotated_frame = frame_image.rotate(90, expand=True)
# Convert the frame to a pygame image mode = rotated_frame.mode size = rotated_frame.size data = rotated_frame.tobytes() py_image = pygame.image.fromstring(data, size, mode)
# Append frame and its duration frames.append(py_image) duration = gif.info.get("duration", 100) / 1000.0 # Duration in seconds frame_durations.append(duration)
return frames, frame_durations
# Function to play a GIF frame-by-frame on the pygame displaydef play_gif(frames, frame_durations): current_frame = 0 # Start with the first frame last_update_time = pygame.time.get_ticks() # Time tracking for frame updates
while current_frame < len(frames): # Handle user events (e.g., quit or escape key) for event in pygame.event.get(): if event.type == pygame.QUIT: return False elif event.type == pygame.KEYDOWN: if event.key == pygame.K_ESCAPE: return False
now = pygame.time.get_ticks()
# Check if it's time to update the frame if now - last_update_time > frame_durations[current_frame] * 1000: current_frame += 1 last_update_time = now
if current_frame < len(frames): # Center the frame on the screen and display it frame_rect = frames[current_frame].get_rect(center=(235, 245)) screen.blit(frames[current_frame], frame_rect) pygame.display.flip()
clock.tick(60) # Limit the loop to 60 frames per second
return True
# Main loop that handles GPIO scheduling and GIF playbackrunning = Trueclock = pygame.time.Clock() # Clock to control frame rate
try: while running: if SCHEDULE: # Execute any scheduled GPIO tasks schedule.run_pending()
# Randomly select a GIF file based on weights current_gif, _ = random.choices(gif_files, weights=[w for _, w in gif_files], k=1)[0] gif_path = os.path.join("/home/pi", current_gif) # Path to the selected GIF
# Load and play the selected GIF frames, frame_durations = load_gif(gif_path) running = play_gif(frames, frame_durations)
except KeyboardInterrupt: # Graceful exit on manual interruption print("Program interrupted")
finally: # Clean up GPIO and quit pygame GPIO.cleanup() pygame.quit()I found someone on Fiverr to create these gifs for me. Feel free to download them and use them.

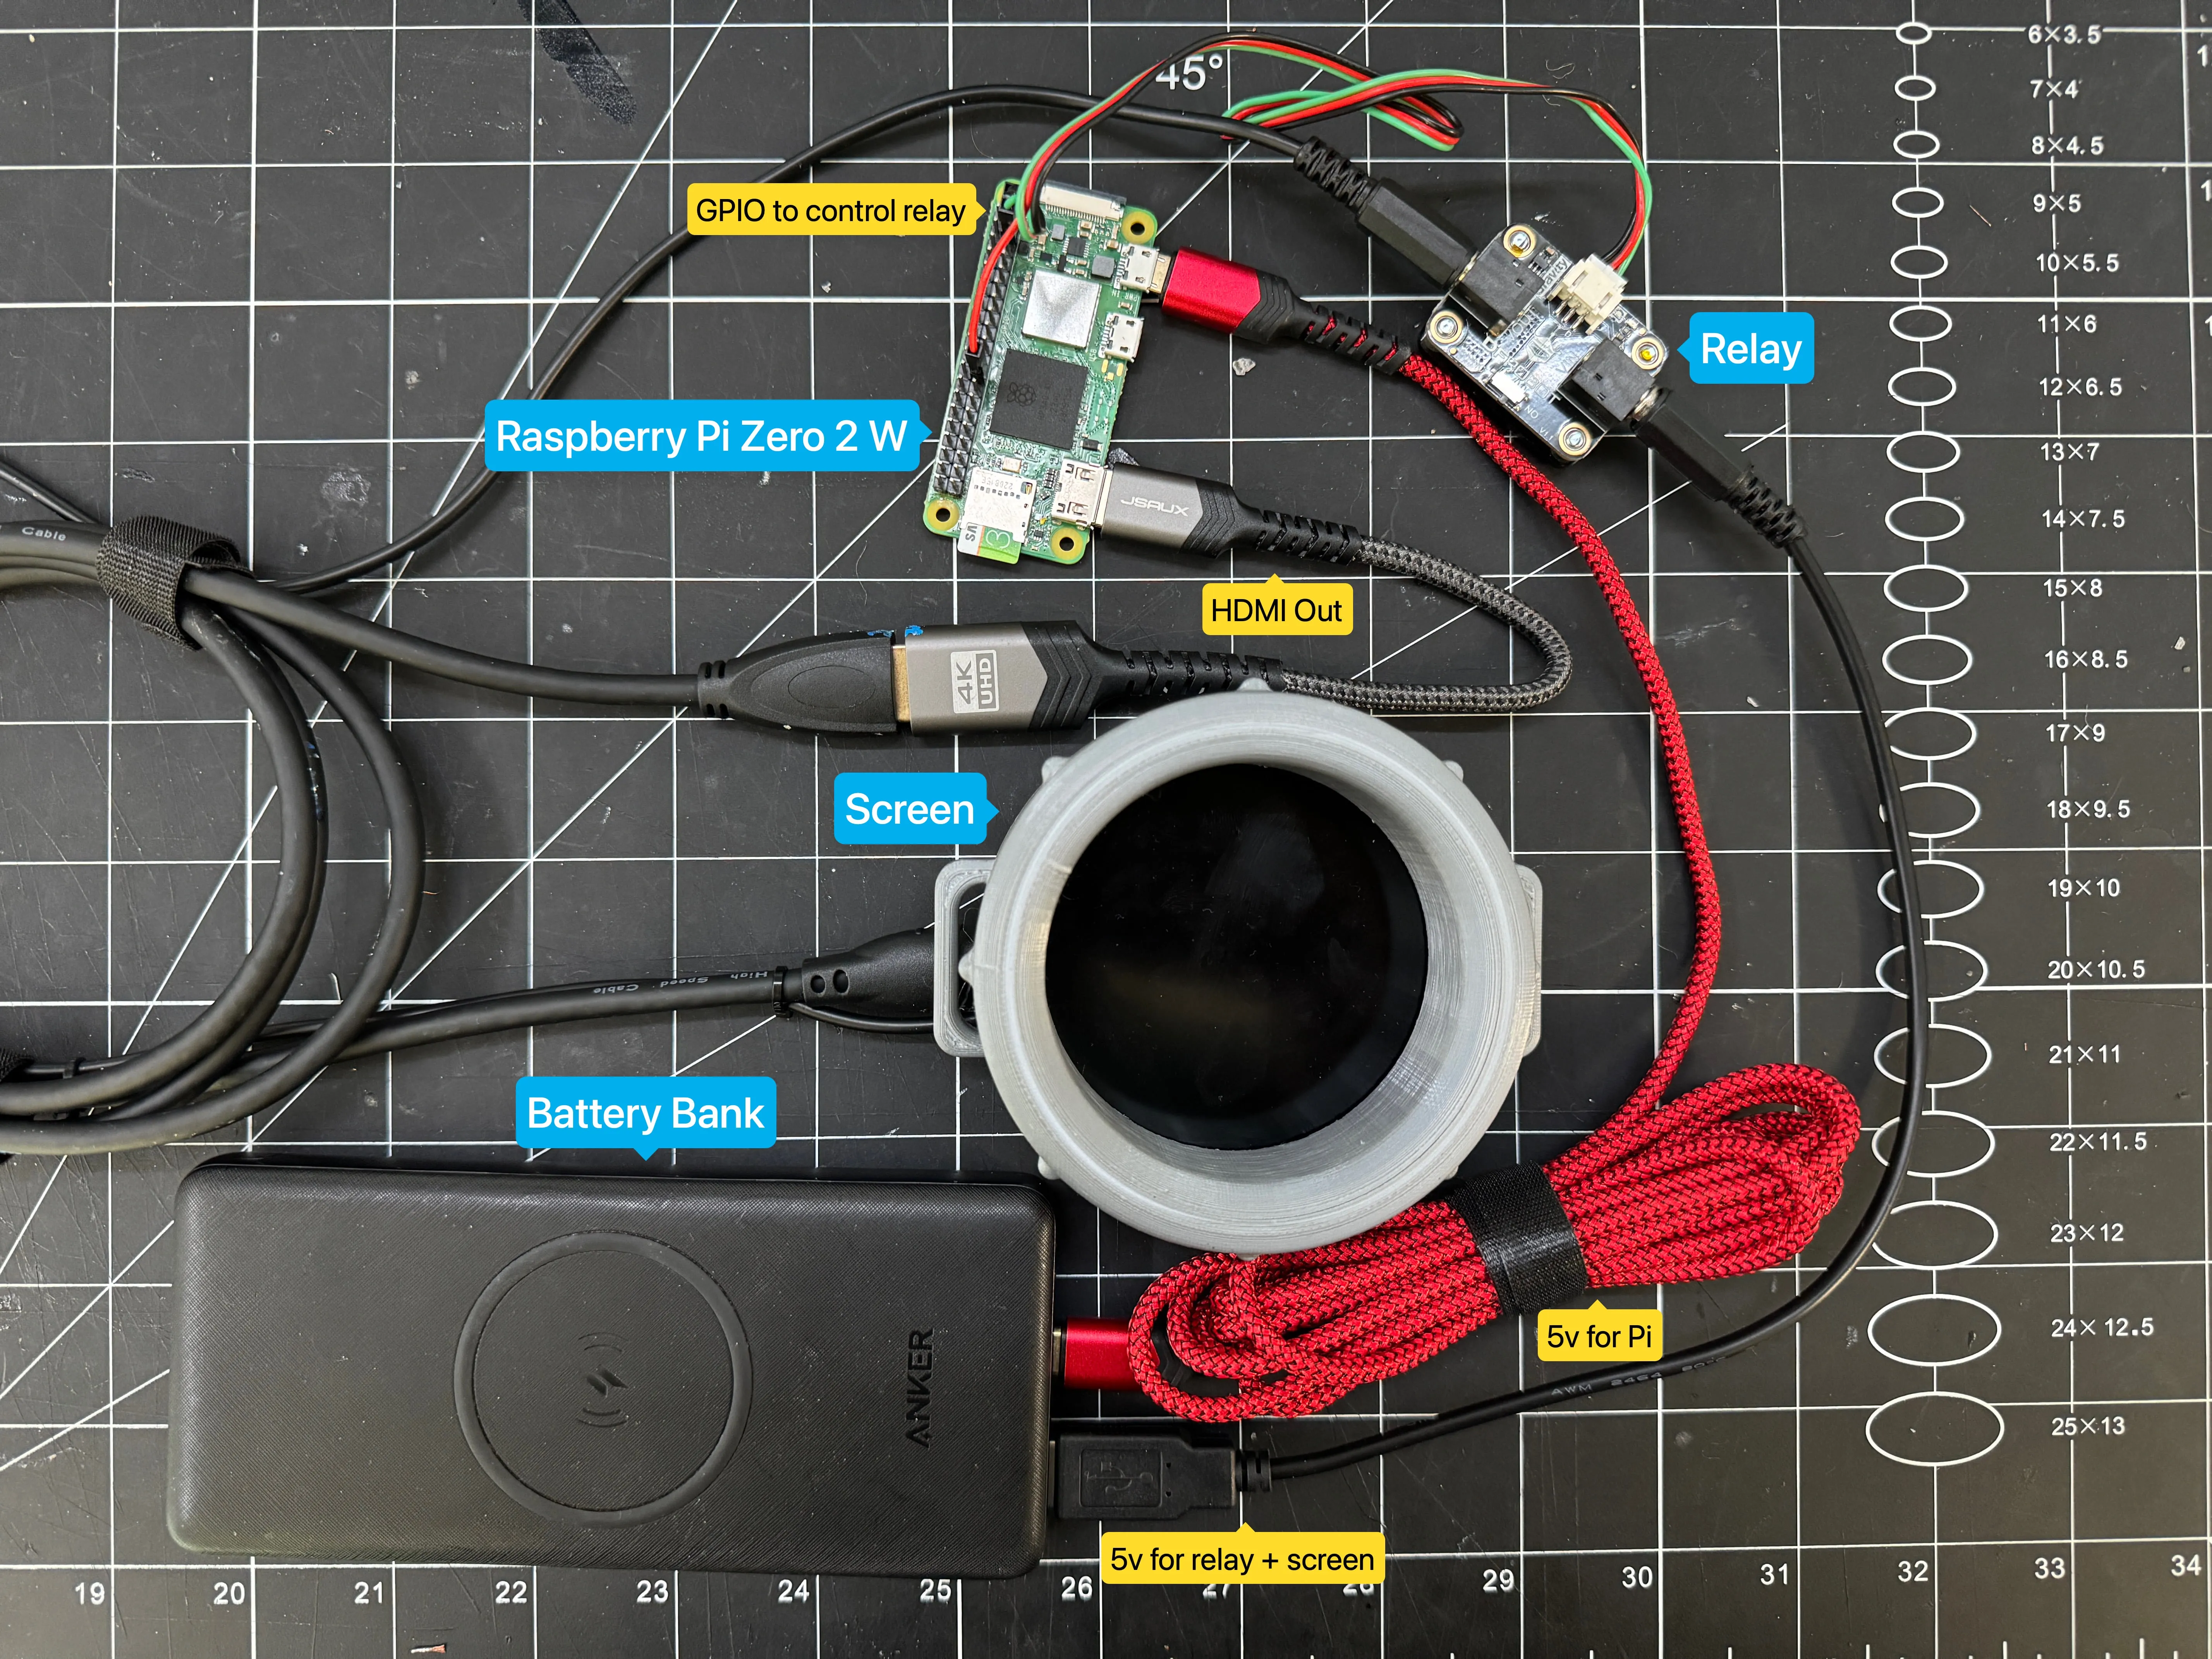
Connect the Raspberry Pi and the relay to the battery bank for power.
Connect the display to the relay for power.
Connect the display to the Pi via mini HDMI.
Connect the relay to the Raspberry Pi’s GPIO pins: 26, 3.3v, Ground. For a more detailed look at the GPIO pins, checkout pinout.xyz.
sudo apt updatesudo apt full-upgradesudo pip3 install pygame pillow schedule RPi.GPIOeye.py.cd /home/pi/touch eye.pyeye.py.nano eye.pyUse either a flash drive or scp to transfer the three GIF files to the Raspberry Pi. The files should be named blink.gif, look-left.gif, and look-right.gif.
Place the files next to eye.py in the /home/pi/ directory.
If you’d like the animation to automatically play after the Pi boots then follow these instructions, otherwise skip to the next section.
/etc/systemd/system/ directory.cd /etc/systemd/system/eye.service and add the following.[Unit]Description=Eye GIF DisplayAfter=multi-user.target
[Service]ExecStart=/usr/bin/python3 /home/pi/eye.pyUser=piEnvironment=DISPLAY=:0Environment=XAUTHORITY=/home/pi/.Xauthority
[Install]WantedBy=multi-user.targeteye.py file from earlier executable.chmod +x /home/pi/eye.pysystemd manager configuration and enable the eye.service so it runs automatically after boot.sudo systemctl daemon-reloadsudo systemctl enable eye.servicesudo rebootAs I mentioned above, there are a ton of existing guides on how to paint a Minions pumpkin. A simple search for how to paint minion pumpkin should yield a lot of great written and video tutorials.
Loop the elastic through the printed goggle frame and then create a loop and use the printed elastic clip to keep things together.
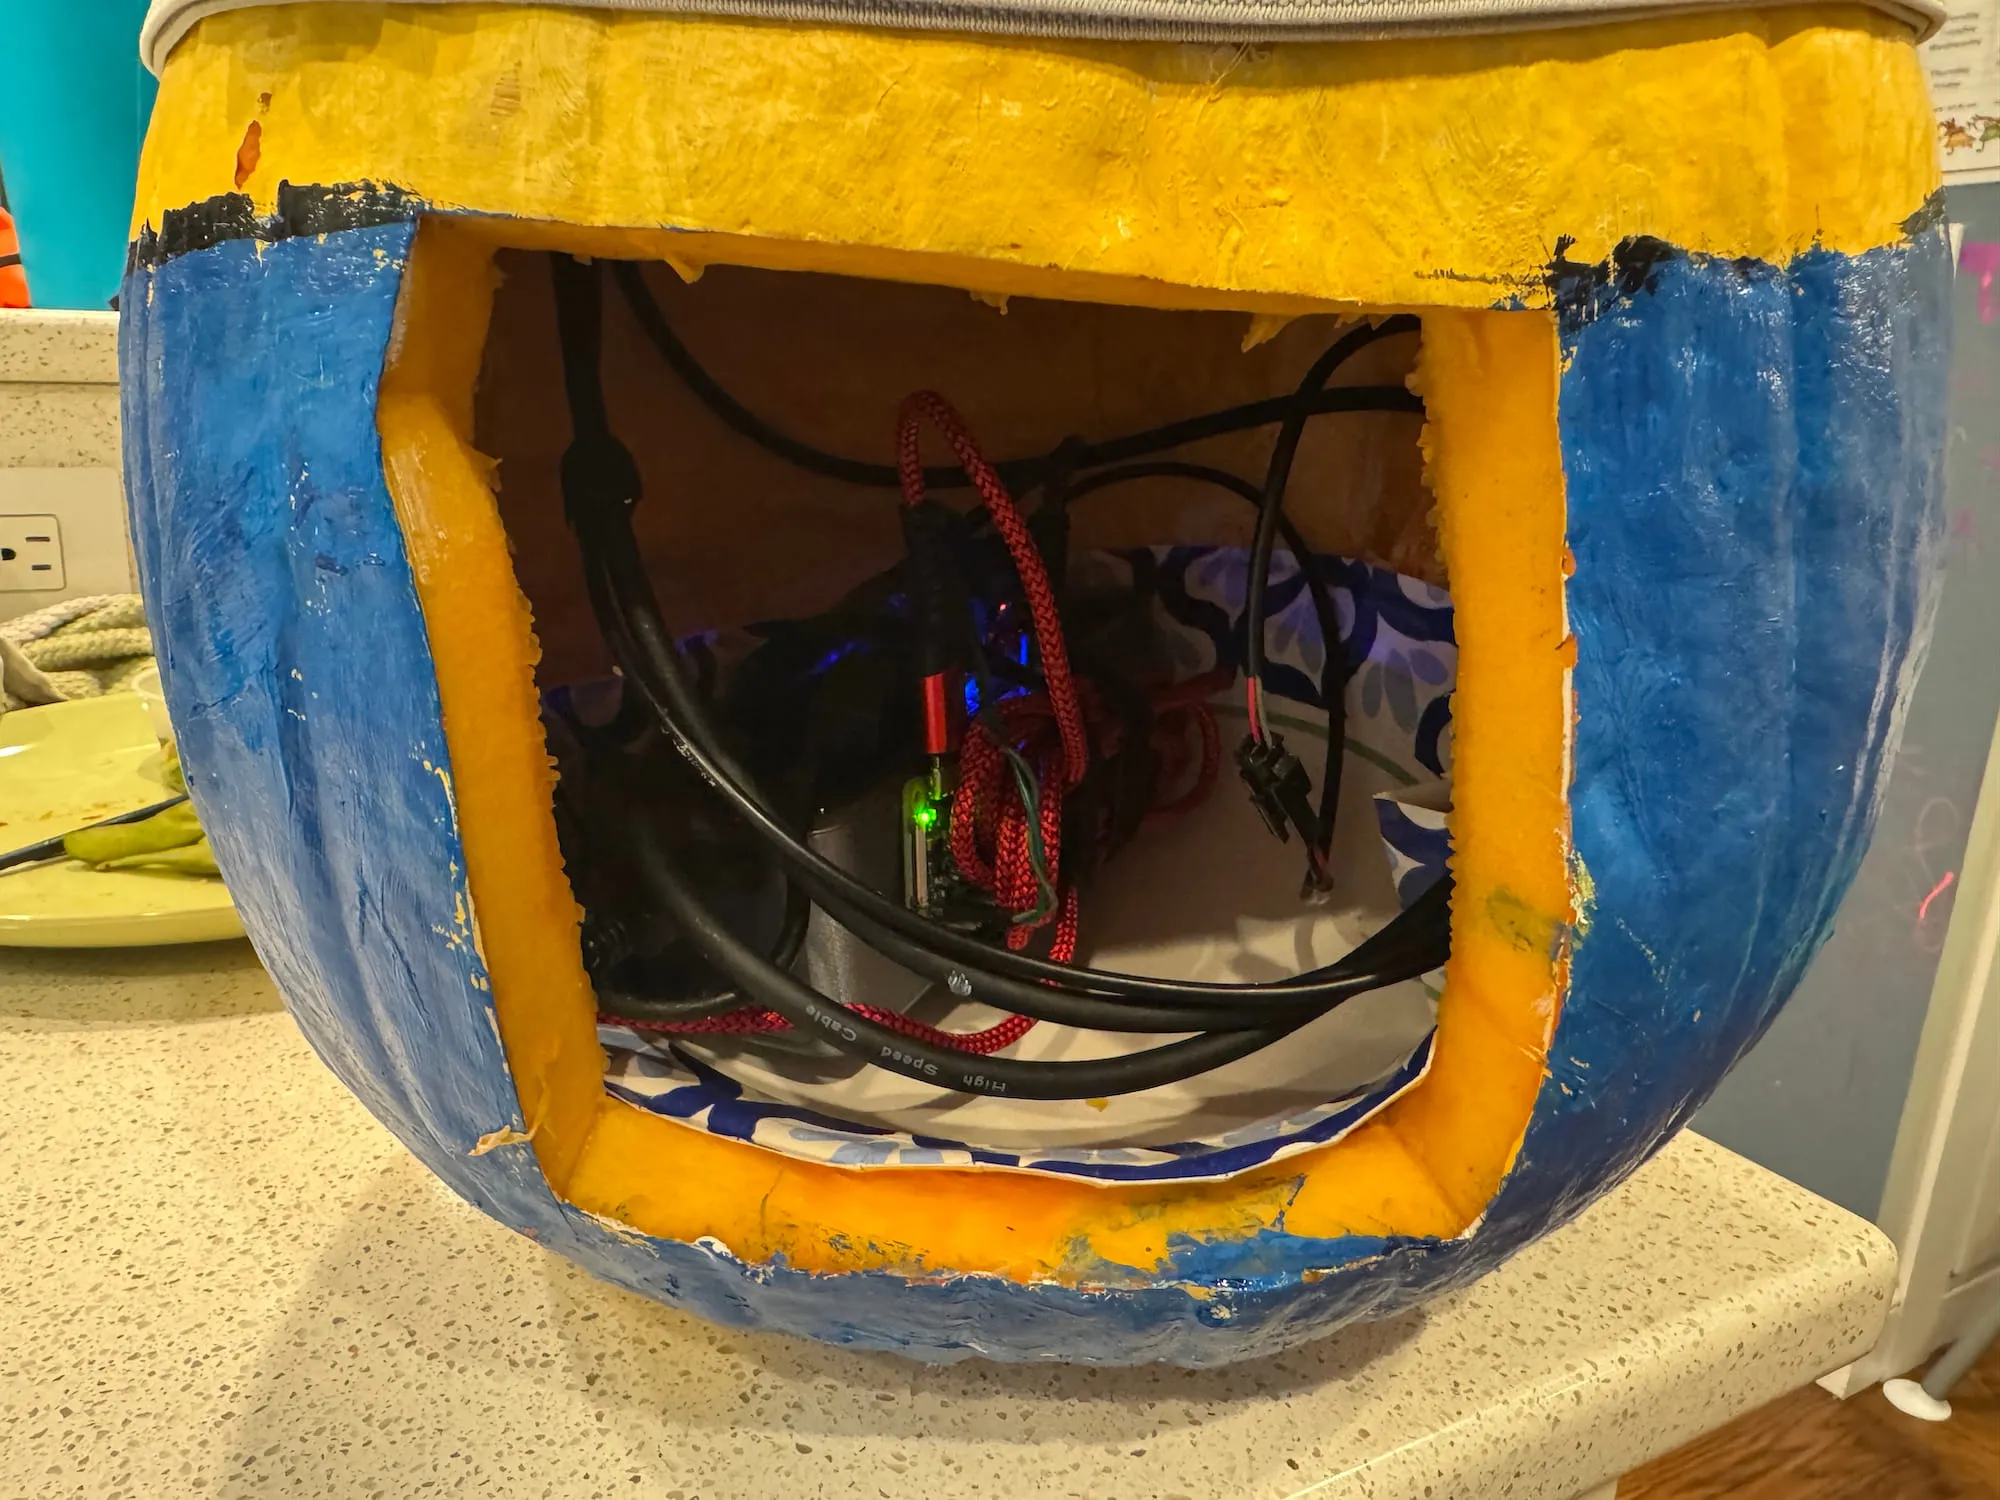
Cut a large hole in the backside of the pumpkin and scrape out the seeds as you would a normal pumpkin carving.
Create a square 1in x 1in hole behind where the elastic strap is to route the display’s power and HDMI cables through to the inside of the pumpkin.
Make all connections and insert everything into the pumpkin.
Close up the hole in the back with the piece you cut out.
Found the above useful? Have a question? Thought of something I didn't?
Consider leaving a comment below or send me an email at johnzanussi@gmail.com.
You can also buy me a coffee. Cheers!

Comments