Use UniFi G4 Doorbell Fingerprint to Unlock Home Assistant Lock
🗓️ • ⏱️ 6 min read

🗓️ • ⏱️ 6 min read
Now that UniFi has finally enabled both the fingerprint scanner and NFC card readers in the G4 Pro Doorbell in Protect 5.1, we can integrate it with Home Assistant to unlock any lock and trigger other automations.
The setup is straightforward, but there are a few prerequisites you’ll need to check before starting:
Registering fingerprints is done via the UniFi Protect mobile app.
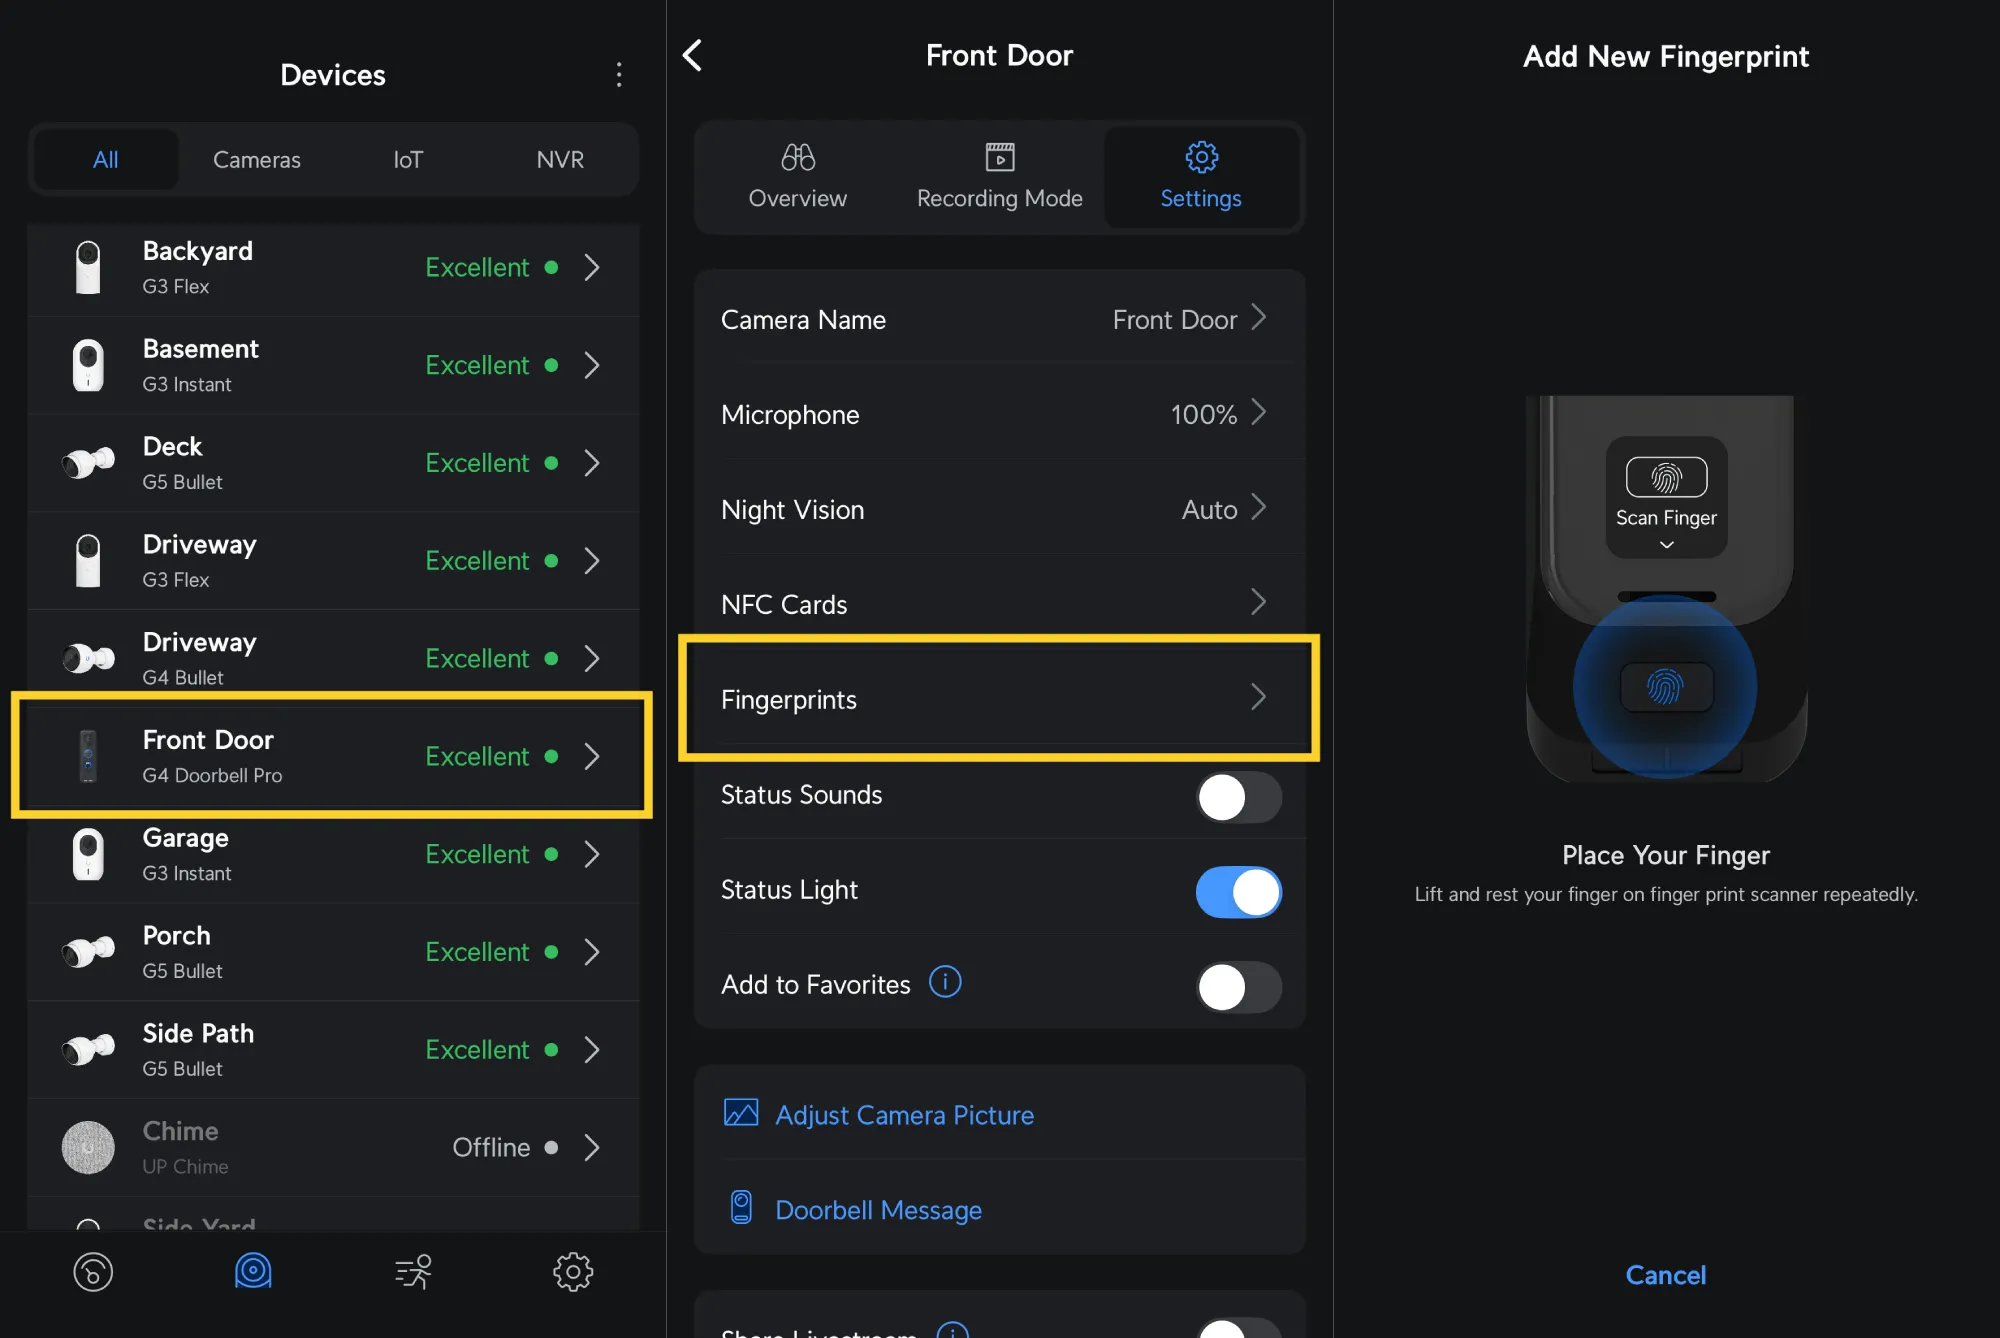
You can also register NFC cards if you prefer to use them.
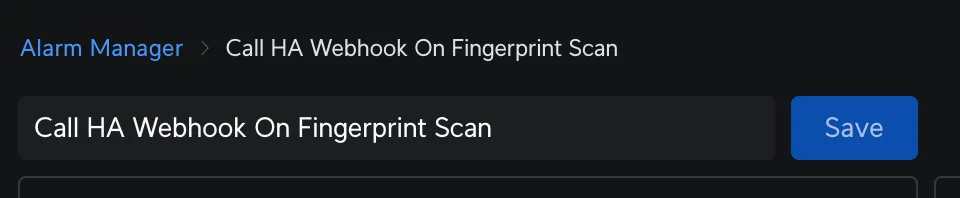
If you are running Home Assistant version 2024.11 or earlier, you can either update to at least 2014.12 or skip down to the instructions on using webhooks to trigger the unlock automation.
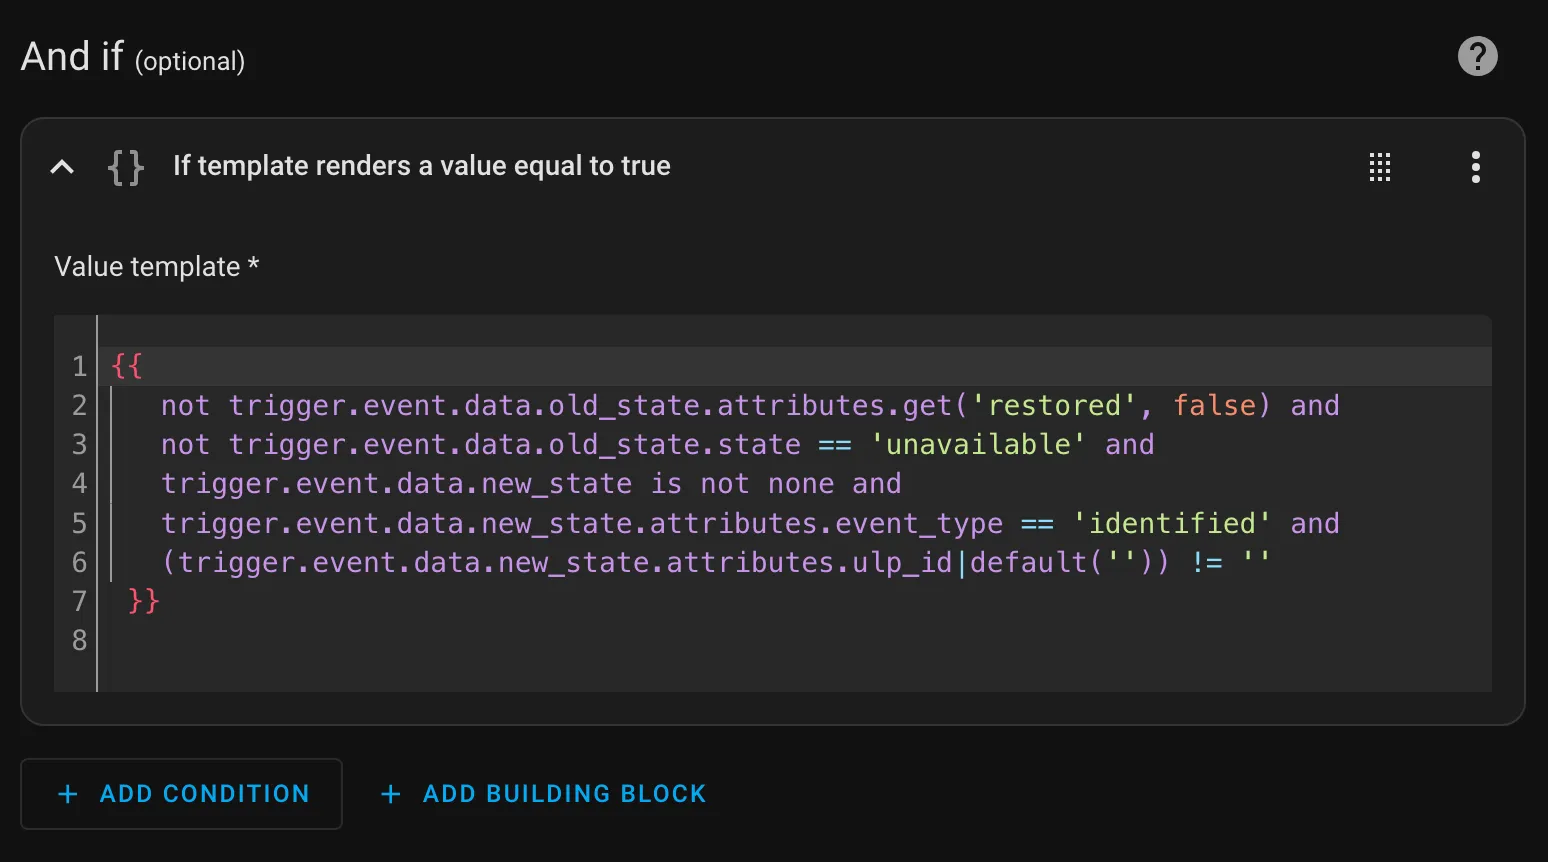
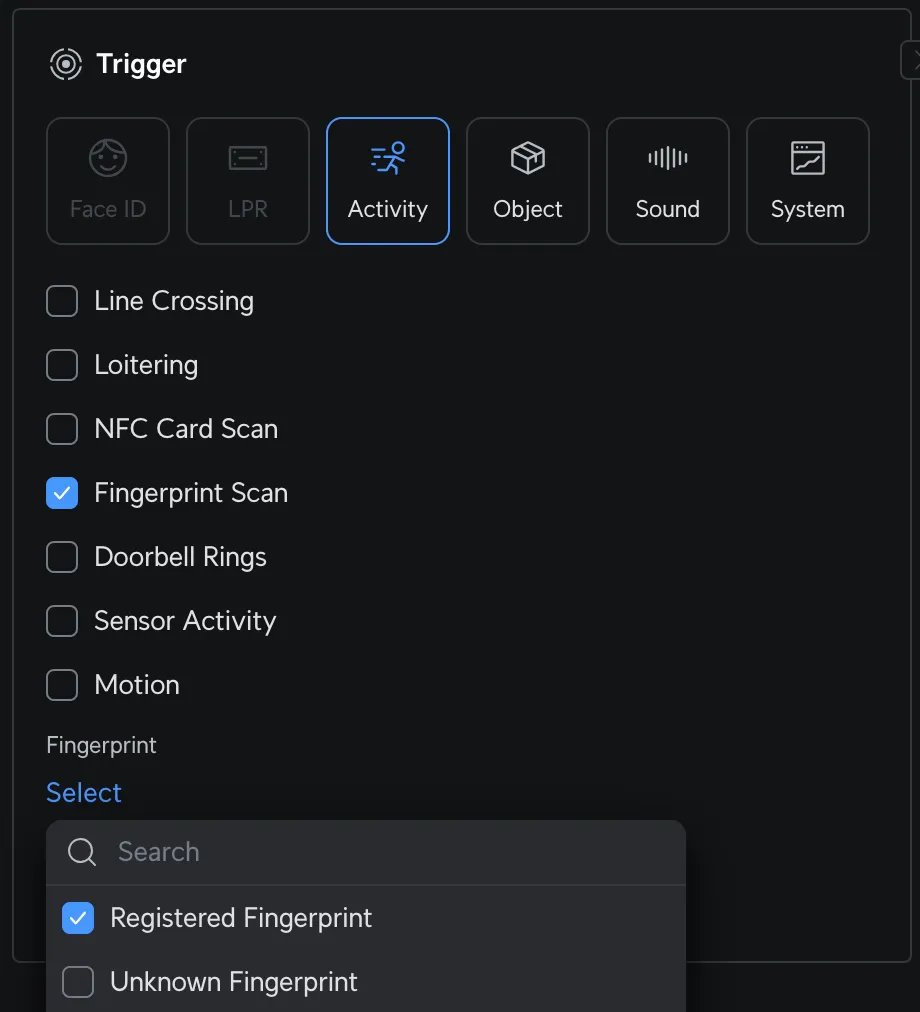
The automation will be triggered by a state change of the G4 Doorbell with an event_type of either identified or not_identified. A condition template will check between these two event types and call the unlock action when an identified fingerprint is scanned.
state_changed in the Event type text boxevent.front_door_fingerprint is the entity_id for your G4 Doorbell Pro
{{ not trigger.event.data.old_state.attributes.get('restored', false) and not trigger.event.data.old_state.state == 'unavailable' and trigger.event.data.new_state is not none and trigger.event.data.new_state.attributes.event_type == 'identified' and (trigger.event.data.new_state.attributes.ulp_id|default('')) != ''}}This template is taken directly from the official Home Assistant documentation and checks for new scans of identified fingerprints. An identified fingerprint refers to any fingerprint that has been registered in the Protect app.
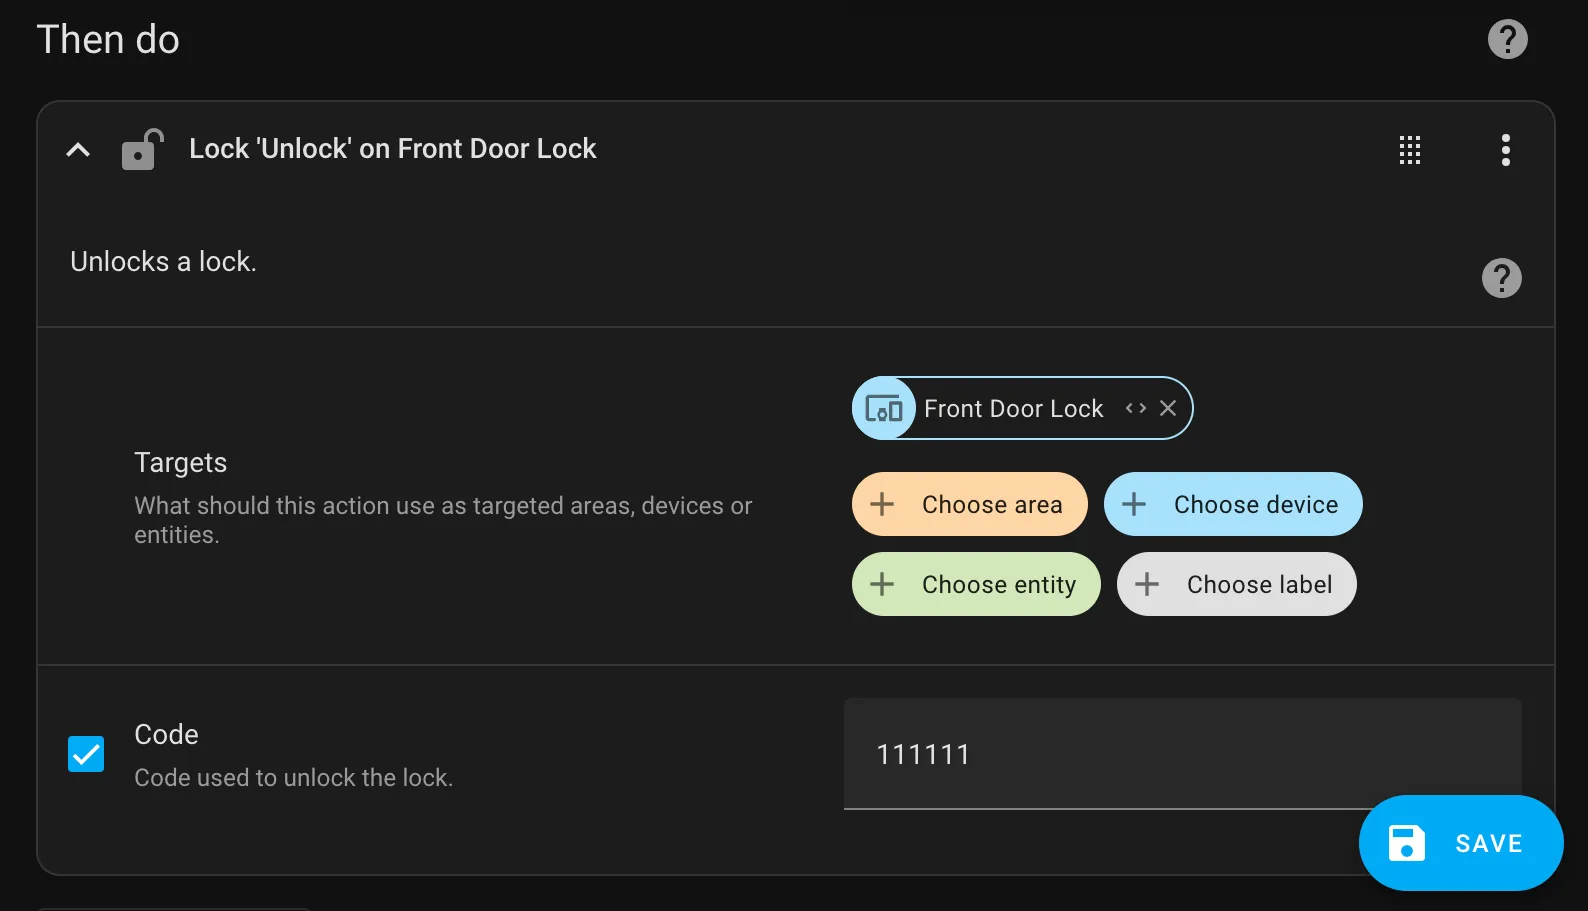
Now that we have a way of triggering this automation we can setup the actions the webhook will take. In this case we want to unlock a lock but this could be setup to do anything that HA can do like sending a notification, turning on/off lights, opening a garage door, etc.
Your automation should now be visible from the Automations screen.
If you’re using version 2024.12 or later and completed the steps above, you can skip these instructions and proceed to the Test section.
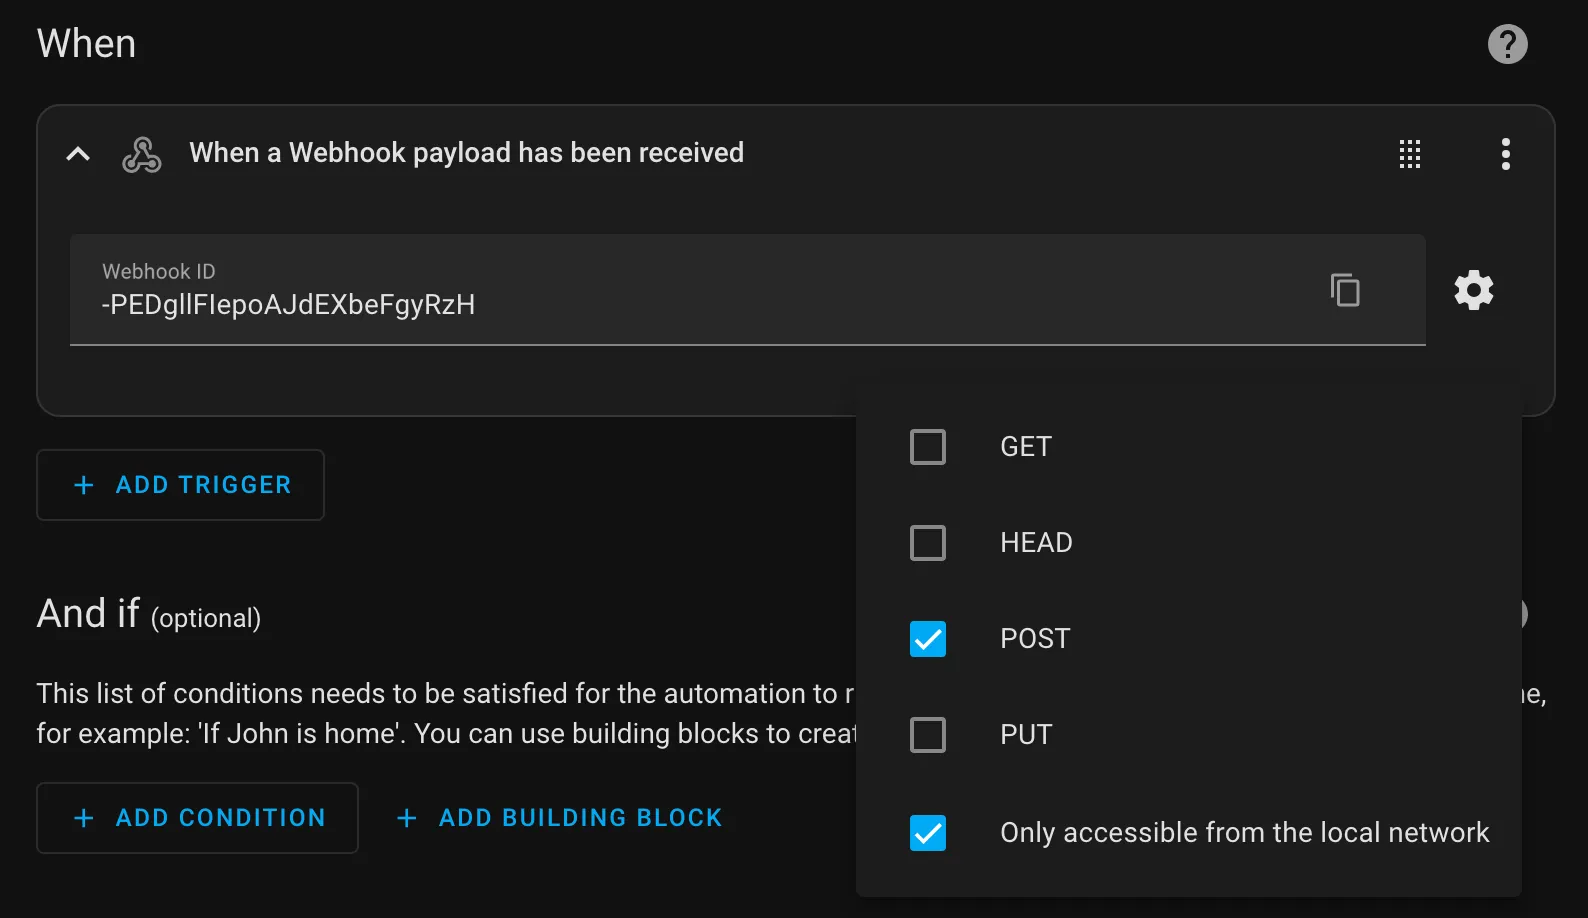
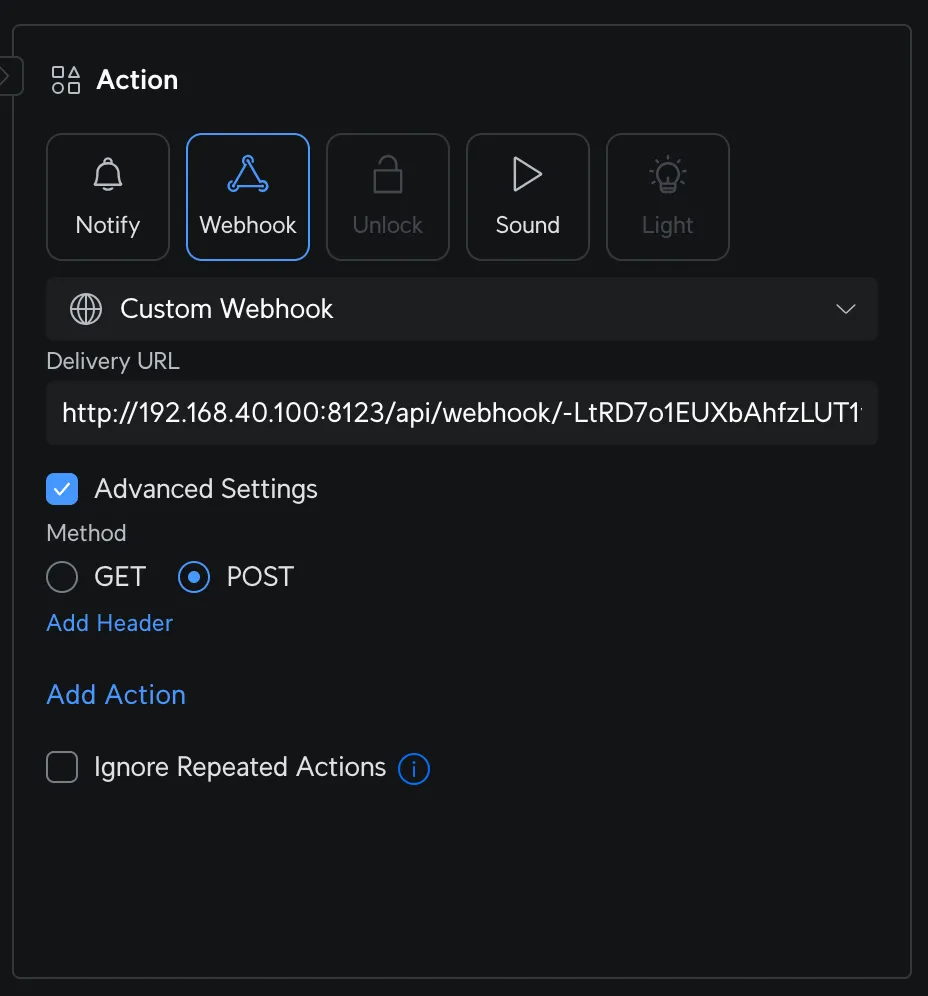
The automation will be triggered by a webhook from UniFi Protect, calling the unlock action on your desired lock.
The webhook trigger should now be setup. A random Webhook ID will be generated. You can leave it as is or customize it.
Now that we have a way of triggering this automation we can setup the actions the webhook will take. In this case we want to unlock a lock but this could be setup to do anything that HA can do like sending a notification, turning on/off lights, opening a garage door, etc.
Your automation should now be visible from the Automations screen.
You can now trigger this automation by issuing a POST request to the following URL. Replace <haURL> with your Home Assistant URL or IP, and <webhookID> with your generated Webhook ID.
http://<haURL>/api/webhook/<webHookID>An example full URL would be
http://192.168.40.100:8123/api/webhook/-LtRD7o1EUXbAhfzLUT1varMjNext, configure UniFi Protect to call the webhook when a recognized fingerprint is successfully scanned.
If everything is set up correctly, your lock should unlock. In my case, the time between scanning my fingerprint and unlocking the lock is about 1.5 seconds. However, your results may vary depending on your home network and setup.
Found the above useful? Have a question? Thought of something I didn't?
Consider leaving a comment below or send me an email at johnzanussi@gmail.com.
You can also buy me a coffee. Cheers!

Comments